Sunset Mountain Watercolor: A Step-by-Step Tutorial

Disclosure: This post contains affiliate links, meaning if you make a purchase via the links, we will earn a commission at no additional cost to you. Please read the full disclosure.

Disclosure: This post contains affiliate links, meaning if you make a purchase via the links, we will earn a commission at no additional cost to you. Please read the full disclosure.

watercolor

Before we begin, let’s gather the essential materials you’ll need for this watercolor tutorial:

With these materials at hand, you’ll be well-equipped to embark on your watercolor skyline painting journey.

Introduction to sunset watercolor painting

Capturing the beauty of a sunset in watercolor is a captivating and rewarding experience. The vibrant hues, the soft gradients, and the ethereal glow of the setting sun create a stunning visual spectacle that can be translated onto paper with the right techniques and color palette. In this comprehensive tutorial, I will guide you through the process of painting a breathtaking sunset over a majestic mountain landscape.

Watercolor painting is an art form that requires patience, practice, and an understanding of color theory and brush techniques. The beauty of watercolor lies in its unpredictable nature, allowing for happy accidents and unique textures to emerge. By mastering the art of controlling the flow of pigments and water, you can create stunning masterpieces that evoke a sense of tranquility and awe.

Understanding the color palette for sunset skies

Capturing the essence of a sunset requires a deep understanding of color theory and the interplay of warm and cool hues. The sky during a sunset is a mesmerizing blend of oranges, reds, pinks, and purples, transitioning into cooler tones of blues and violets as the sun dips below the horizon.

To achieve a realistic and vibrant sunset, you’ll need to work with a range of warm and cool colors. Some essential colors for your palette include:

  • Warm hues: Cadmium red, cadmium yellow, alizarin crimson, vermilion, and burnt sienna
  • Cool hues: Ultramarine blue, Prussian blue, phthalo green, and violet

By understanding how to mix and layer these colors, you can create a stunning gradient that captures the ever-changing hues of a sunset sky.

watercolor

Step 1

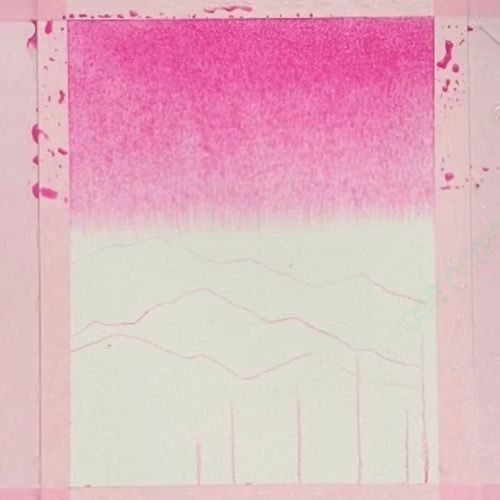
Sketching the outline of the mountain and landscape: Begin by securing your watercolor paper to a flat surface using masking tape or clips. Next, lightly sketch the outline of the mountain and landscape using a pencil. This will serve as a guide for your painting and help you establish the overall composition. Remember to keep the lines light and easy to erase or lift later.

watercolor

Step 2

Layering the warm colors for the sunset sky: Wet the whole paper with clear water for the wet-on-wet technique. Begin by mixing a warm pink hue on your palette. Using a large, flat brush, apply a wash of this color across the upper portion of the sky.

watercolor

Step 3

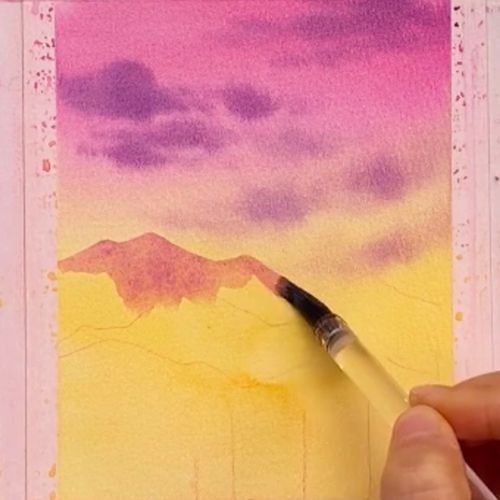
Add yellow hue: Next, mix a vibrant yellow such as cadmium yellow. Apply this color in a horizontal band below the pink, blending the edges to create a smooth gradient.

watercolor

Step 4

Add clouds: While the paper is still wet, add clouds to the sky. Begin by mixing a cool violet shade, such as ultramarine violet or dark purple, on your palette. Loosely paint the cloud shapes.

watercolor

Step 5

Add more clouds: Remember to relax your hands when you paint the clouds. and let the shapes of cloud blending in the sky slowly.

watercolor

Step 6

Dry the paper: After the painting of clouds, now wait for the paper getting fully dried.

watercolor

Step 7

Adding depth and dimension to the mountains: Using a round brush, apply the pink color to the base of the mountains, creating a sense of depth and atmospheric perspective. Vary the intensity of the color, with darker tones at the bottom and lighter tones towards the top.
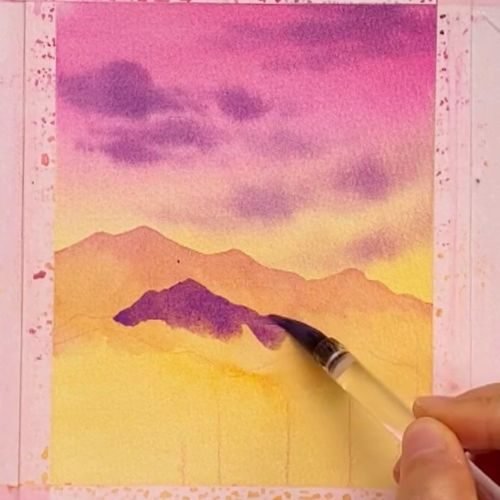
watercolor

Step 8

Paint the mountains: Next, introduce shades of purple and violet by mixing the blue with a touch of alizarin crimson or permanent rose. Apply these colors to the mid-tones of the mountains, creating a sense of depth and shadow.

watercolor

Step 9

Observe the painting: Wait for the former layers getting dried before applying the new layers.

watercolor

Step 10

Finish painting the mounatin: Finally, use a rigger or detail brush to add highlights and texture to the mountain peaks. Mix a light, warm shade by combining cadmium yellow and a touch of white gouache or Chinese white. Apply these highlights sparingly, allowing the warm tones to pop against the cooler shadows.

watercolor

Step 11

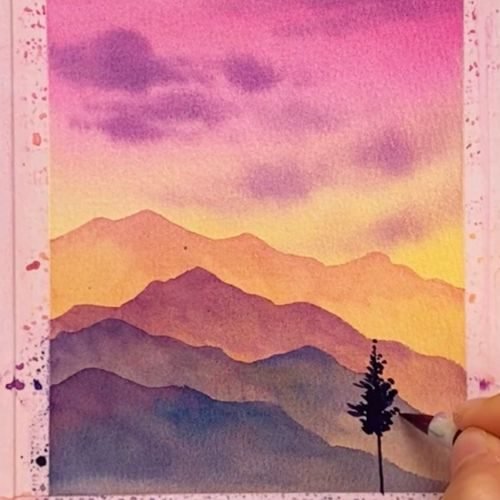
Painting the foreground: With the sky and mountains complete, it's time to focus on the foreground elements. If you've included trees or foliage in your sketch, mix shades of bluish gray or blue to create depth and variation.

watercolor

Step 12

:Once you've completed the foreground elements, take a step back and evaluate your painting.

watercolor

Step 13

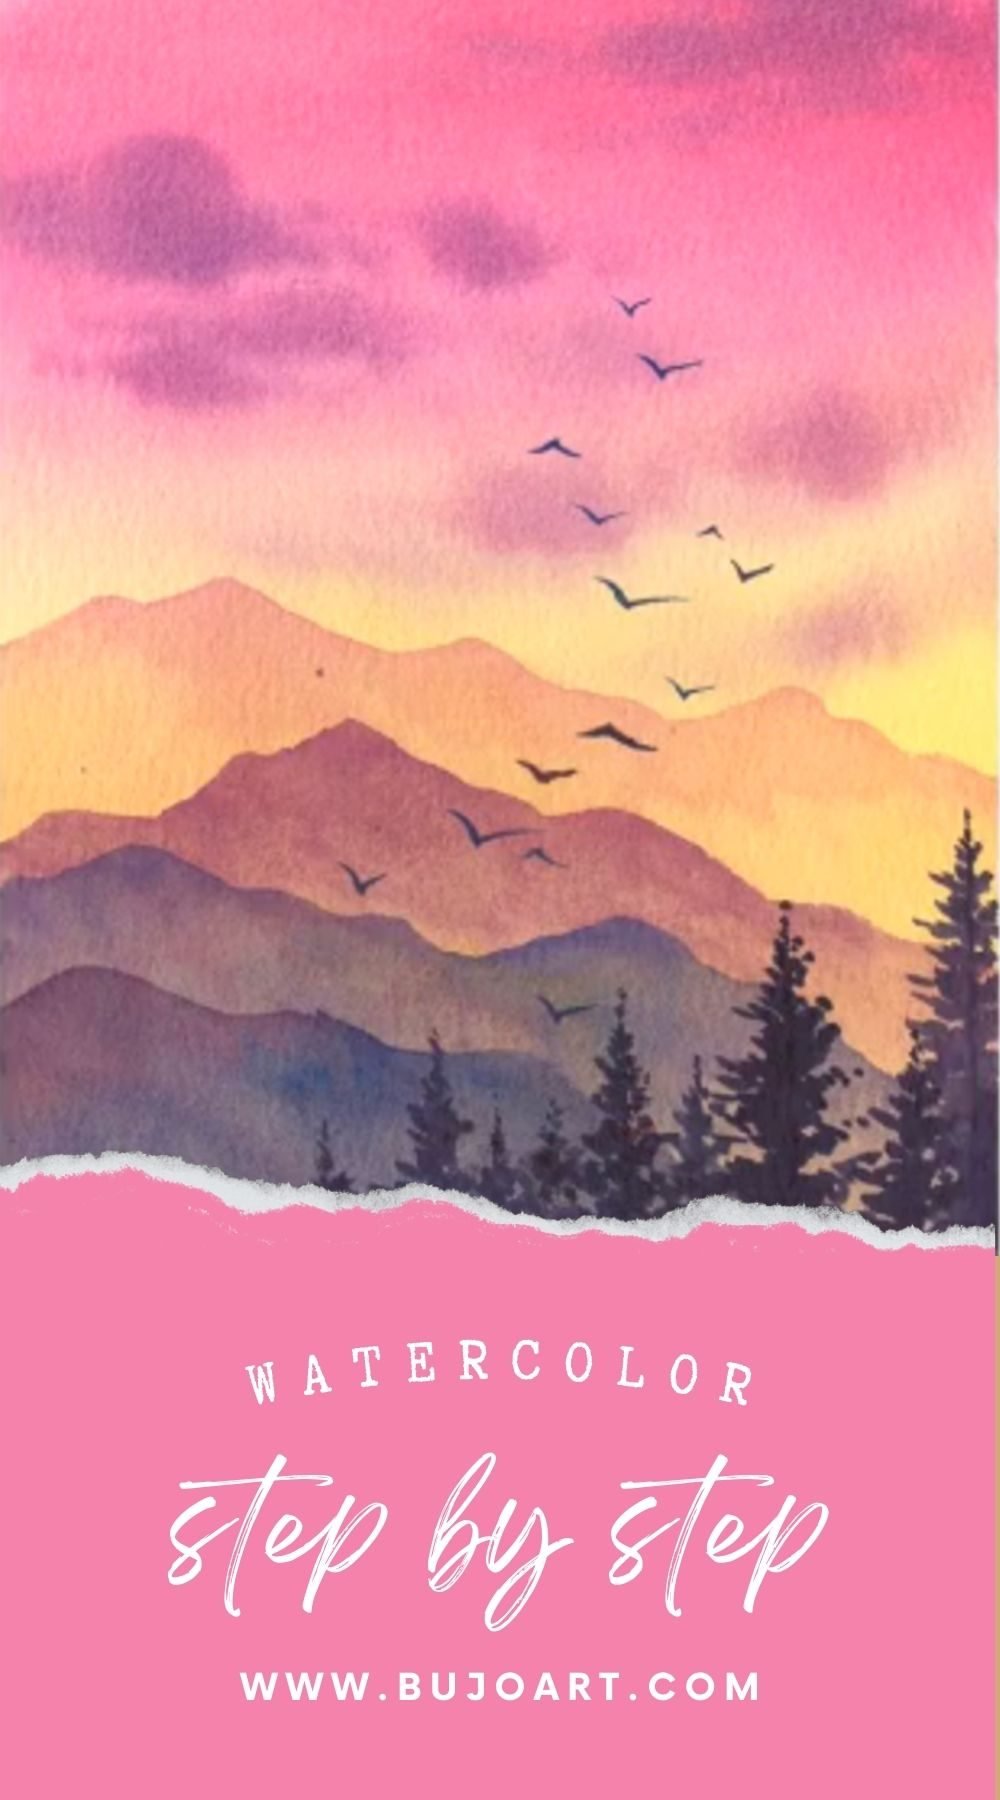
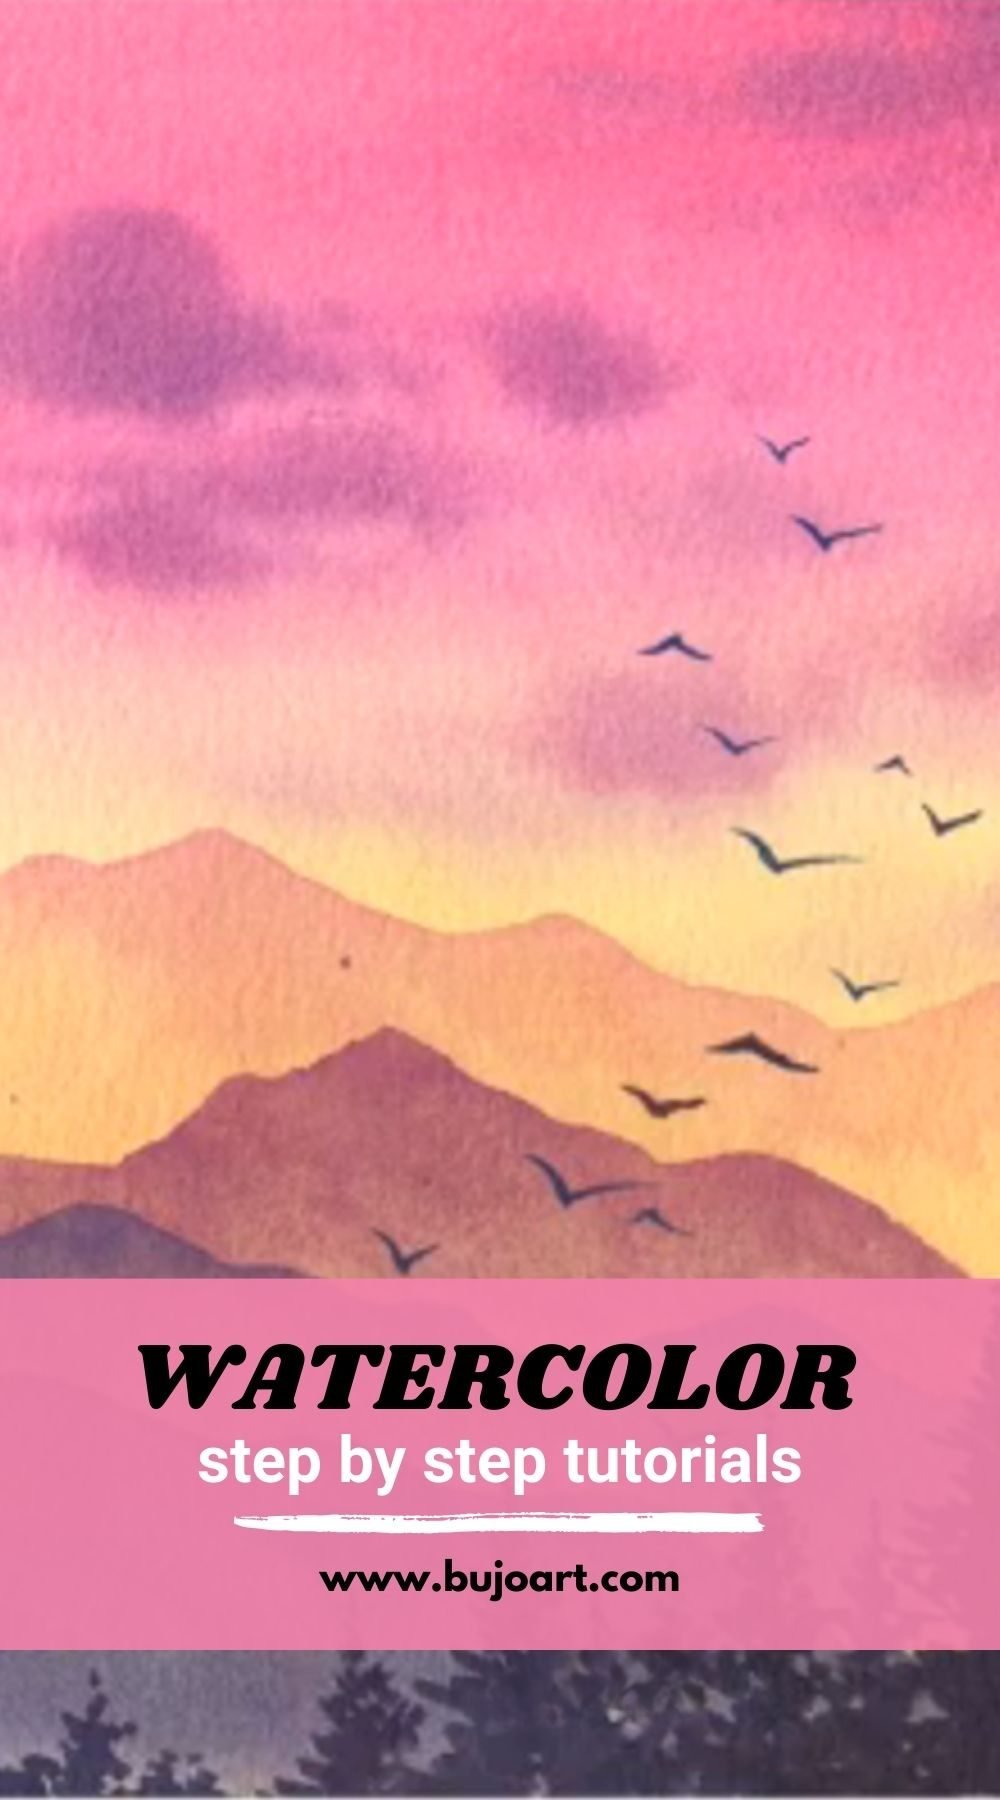
Add birds in the sky: If desired, you can add small details like birds, adding a sense of scale and life to your painting.

Tips and techniques for achieving realistic sunset effects

To truly capture the essence of a sunset, consider incorporating the following tips and techniques:

  1. Glazing: Apply thin, transparent layers of color over one another to create depth and luminosity. This technique is particularly effective for creating the soft, glowing hues of a sunset sky.

  2. Wet-on-wet technique: Work with wet paint on wet paper to create seamless blends and gradients. This technique is ideal for achieving the smooth transitions found in sunset skies.

  3. Lifting and blotting: Use a clean, damp brush or paper towel to lift or soften areas of color, creating natural-looking textures and atmospheric effects.

  4. Masking fluid: Apply masking fluid to areas you want to preserve as white or light highlights, such as the sun or bright reflections on water. Remove the masking fluid once the painting is complete to reveal the preserved areas.

  5. Negative painting: Instead of painting the subject directly, paint around it, allowing the white of the paper to become the subject itself. This technique can be effective for creating the illusion of a glowing sun or bright highlights.

By incorporating these techniques and experimenting with different brushstrokes and color combinations, you’ll be able to achieve a truly realistic and captivating sunset effect in your watercolor painting.

Conclusion

Painting a sunset mountain landscape in watercolor is a rewarding and therapeutic experience. It allows you to immerse yourself in the beauty of nature, capturing the fleeting moments of a day’s end with each brushstroke. Throughout this tutorial, we’ve explored the techniques and color theory necessary to create a stunning sunset painting. Remember, watercolor is a fluid and unpredictable medium, so embrace the happy accidents and let your creativity flow. Happy painting, and may your sunsets be as vibrant and awe-inspiring as the ones you’ll create on canvas.

Trending Posts

Follow Us

Welcome to Bujoart, where creativity knows no bounds! At Bujoart, we believe that art is not just a skill, but a form of expression. Whether you’re a seasoned artist or just starting out on your creative adventure, we have something for everyone.

Popular Articles
Newsletter
Subscribe for more!
Categories
Instagram
Facebook Group
Edit Template