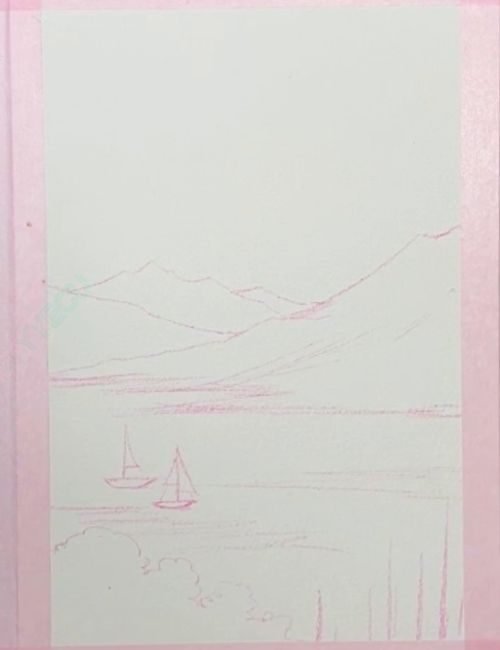
Step-by-Step Lakeview Watercolor Painting Tutorial

Disclosure: This post contains affiliate links, meaning if you make a purchase via the links, we will earn a commission at no additional cost to you. Please read the full disclosure.

Disclosure: This post contains affiliate links, meaning if you make a purchase via the links, we will earn a commission at no additional cost to you. Please read the full disclosure.

watercolor

Before we begin, let’s gather the essential materials you’ll need for this watercolor tutorial:

With these materials at hand, you’ll be well-equipped to embark on your watercolor skyline painting journey.

Introduction to watercolor painting

Watercolor painting is a captivating art form that allows artists to create breathtaking masterpieces with vibrant colors and fluid strokes. In this tutorial, I will guide you through the process of creating a stunning lakeview watercolor painting, perfect for both beginners and experienced artists alike.


Watercolor painting has a unique charm that sets it apart from other mediums. Its transparency and unpredictable nature can be challenging, but with the right techniques and patience, you can achieve stunning results. Whether you’re a hobbyist or an aspiring professional, this tutorial will equip you with the necessary skills to bring your lakeview vision to life.

Choosing the right subject for your watercolor painting

When it comes to watercolor painting, selecting the right subject is crucial. For this tutorial, we’ll focus on creating a lakeview scene, which offers a wealth of possibilities for capturing the beauty of nature.

A lakeview painting can feature various elements, such as:

  • The tranquil waters of the lake, reflecting the surrounding landscape
  • Mountains or hills in the background, adding depth and dimension
  • Trees or foliage along the shoreline, providing texture and contrast
  • Boats or docks, adding interest and a sense of scale
  • Clouds or a colorful sky, enhancing the overall atmosphere

When choosing your reference photo or scene, look for one that inspires you and offers a balance of elements that will translate well into a watercolor painting.

watercolor

Step 1

Sketch your composition: Using a pencil, lightly sketch the basic elements of your lakeview scene onto the watercolor paper. Pay attention to the placement of the horizon line, the shapes of the mountains or hills, and the arrangement of trees or other foreground elements.

watercolor

Step 2

Wet-on-wet technique: This involves applying paint to wet paper, allowing the colors to blend and create soft, organic transitions. For the first step, use flat brush to apply clear water onto the paper and let the water be soaked into the paper.
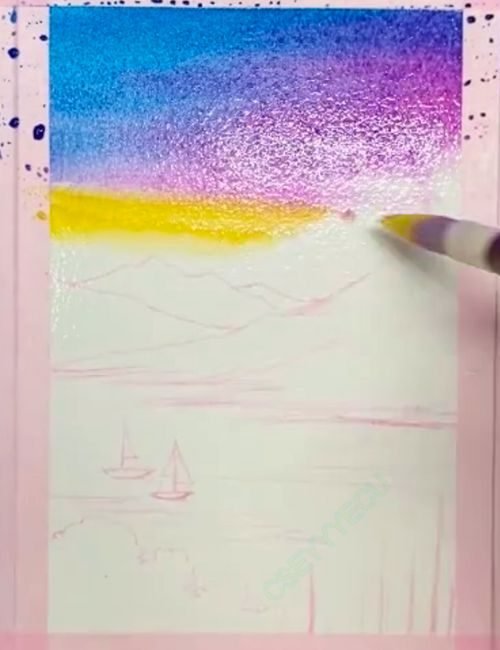
watercolor

Step 3

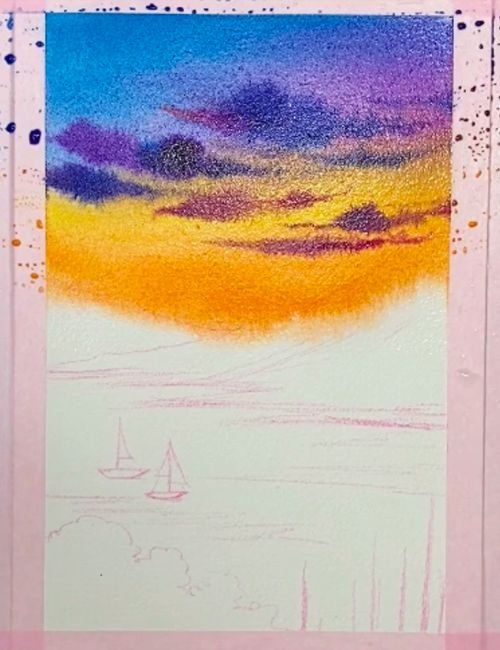
Start with the sky: Begin by painting the sky using the wet-on-wet technique. Apply a wash of your chosen sky color (e.g., cerulean blue, ultramarine, or a mix of both) across the top portion of your paper. Gradually add warm tones into the sky area, such as magenta and yellow to create a beautiful blending.

watercolor

Step 4

Add clouds: While the paper is still wet, add in clouds or other atmospheric elements using a darker hue, such as violet.

Watercolor

Step 5

Paint more clouds: Remember, clouds can take on various forms, from fluffy and billowy to wispy and atmospheric. Slowly create the various forms of clouds.

watercolor

Step 6

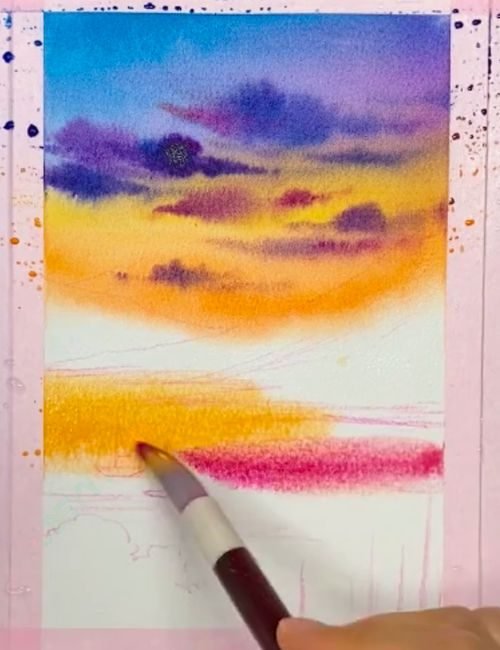
Paint the water: Once the sky is dry, move on to the water. Use the wet-on-wet technique again, but this time, apply a wash of your chosen water color (e.g., coral, yellow, or a mix) across the bottom portion of your paper.
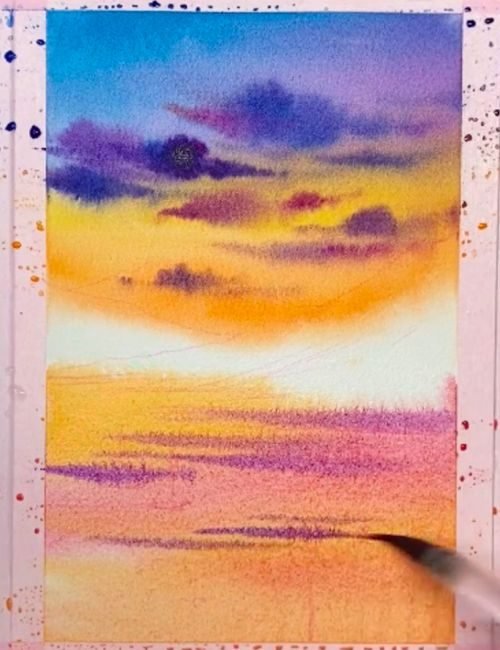
watercolor

Step 7

Add waves: While the paper is still wet, consider adding reflections of the sky or surrounding elements by gently dropping in or lifting out the desired colors.
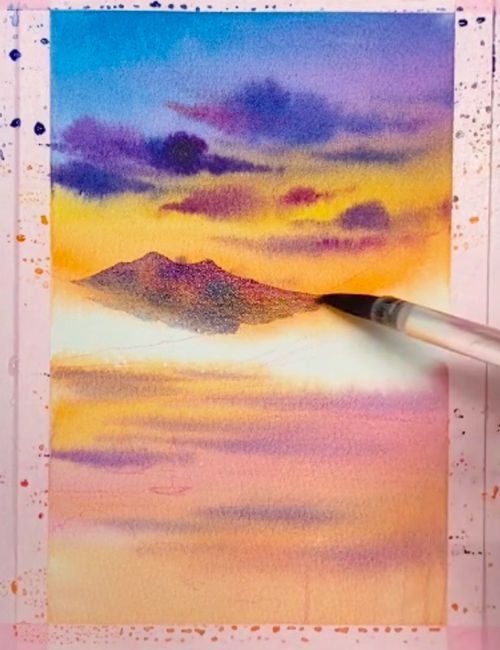
watercolor

Step 8

Add the distant mountains: Next, paint the distant mountains or hills using the wet-on-dry technique. Mix a variety of colors to create depth and dimension, such as blues, purples, and grays for the shadows, and greens or browns for the highlights.
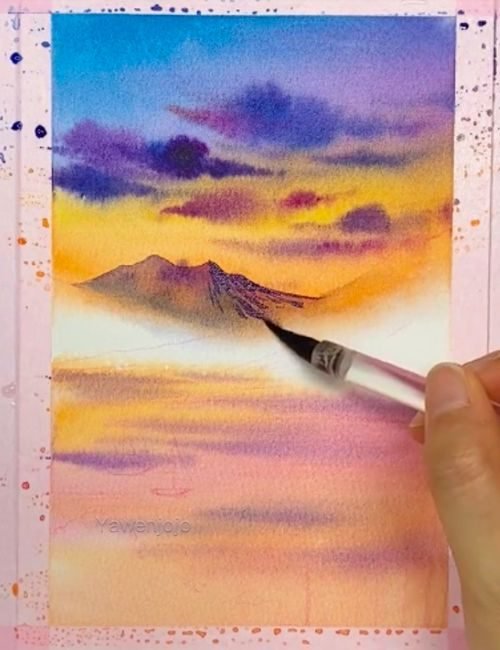
watercolor

Step 9

Add shadows for the mountain: Switch to a smaller round brush or a detail brush to add finer details such as shadows of the mountain.
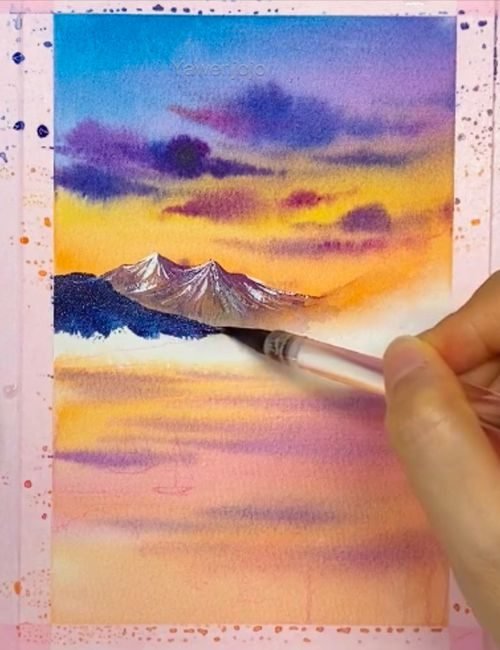
watercolor

Step 10

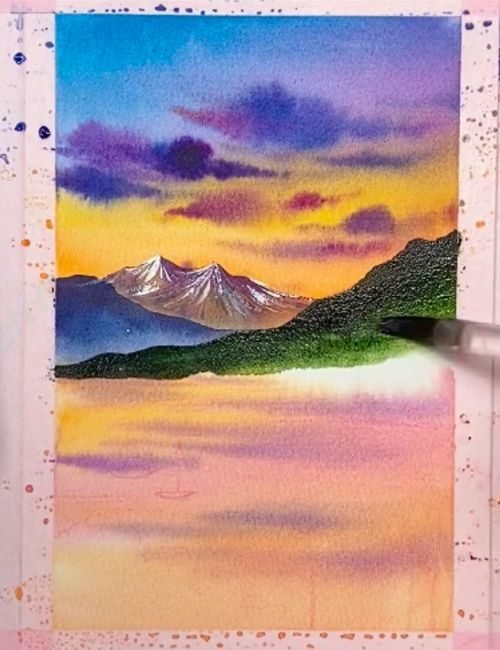
Add textures and enhance reflections of the mountain: Use white color to add finer details and highlights for the mountain.

watercolor

Step 11

Paint midground mountain: Use more saturated color such as Ultramarine to paint the mid-ground mountains.

watercolor

Step 12

Paint foreground mountain:Use saturated earth tone such as hooker's green to paint the foreground mountains.
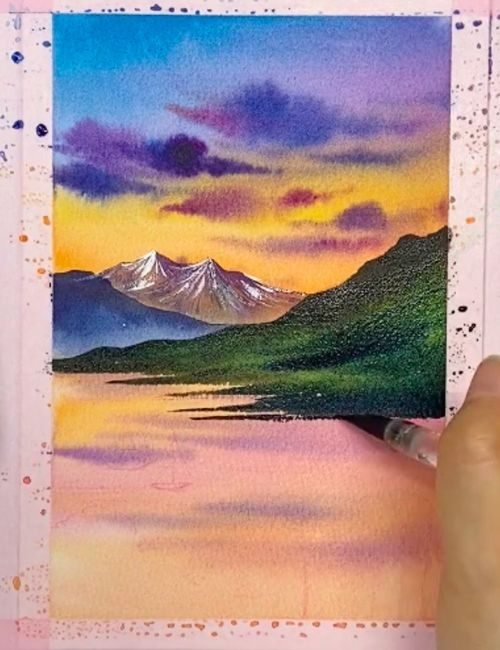
watercolor

Step 14

Add details to mountains: Mix hooker's green and ultramarine blue in your palette, and use small round brush to create darker shadows embedding in the mountain.
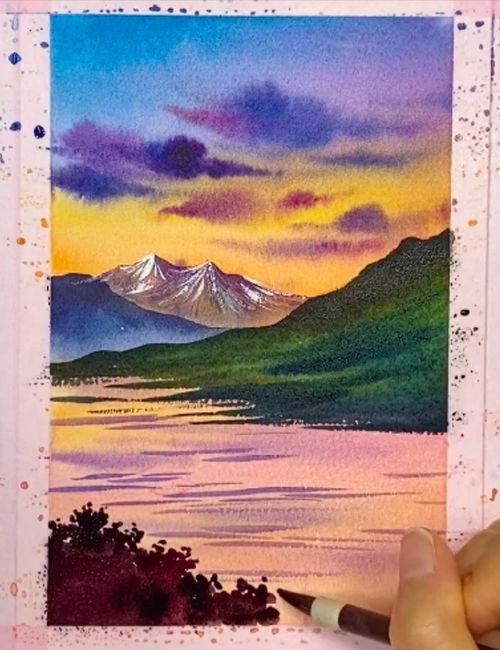
watercolor

Step 13

Introduce the shoreline: With the background elements in place, it's time to add the shoreline. Use a combination of the wet-on-wet and wet-on-dry techniques to create trees, foliage, rocks, or other elements along the water's edge. Experiment with different shades of green, brown, and yellow to capture the natural textures and variations.
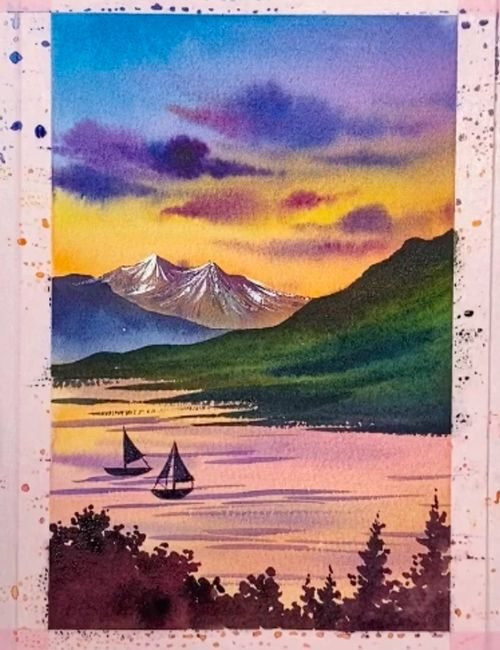
watercolor

Step 14

Add details and interest: Once the main elements are in place, it's time to add details and interest to your painting. Use the dry brushing technique to create the illusion of foliage or other textured elements. Consider adding boats, docks, or other man-made structures to add depth and a sense of scale.
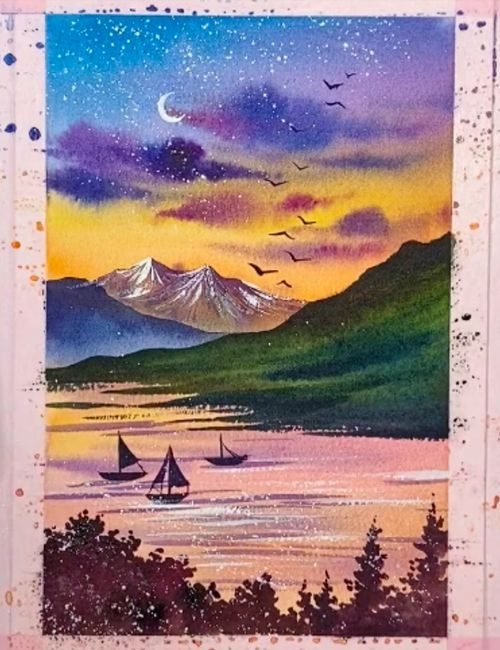
watercolor

Step 16

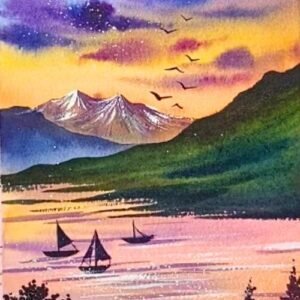
Create highlights on water: To make the water appear more realistic, add highlights using small round brush. Gently apply white color to create the illusion of sunlight reflecting on the surface. Consider adding the birds, moon and stars on the top portion of the sky to achieve a more dynamic scene.

Remember, watercolor painting is a fluid and organic process. Embrace the unpredictable nature of the medium and allow your painting to evolve as you work. Don’t be afraid to experiment and make adjustments along the way.

Final thoughts

Congratulations! You’ve made it through this comprehensive watercolor painting tutorial, and you’re now armed with the knowledge and skills to create stunning lakeview watercolor paintings. Throughout this journey, we’ve explored the essential materials, techniques, and step-by-step processes involved in watercolor painting. We’ve also discussed tips and tricks for achieving realistic results, as well as common mistakes to avoid. Remember, watercolor painting is a journey, and each painting is an opportunity to learn and grow as an artist. Embrace the challenges and celebrate the beautiful, unpredictable nature of this medium.

Trending Posts

Follow Us

Welcome to Bujoart, where creativity knows no bounds! At Bujoart, we believe that art is not just a skill, but a form of expression. Whether you’re a seasoned artist or just starting out on your creative adventure, we have something for everyone.

Popular Articles
Newsletter
Subscribe for more!
Categories
Instagram
Facebook Group
Edit Template