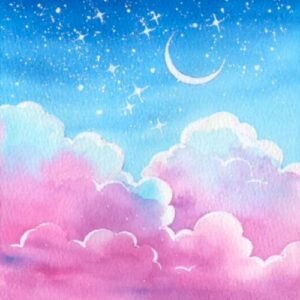
A Step-by-Step Tutorial for Creating a watercolor dreamy sky

Disclosure: This post contains affiliate links, meaning if you make a purchase via the links, we will earn a commission at no additional cost to you. Please read the full disclosure.

Disclosure: This post contains affiliate links, meaning if you make a purchase via the links, we will earn a commission at no additional cost to you. Please read the full disclosure.

watercolor

Before we begin, let’s gather the essential materials you’ll need for this watercolor tutorial:

With these materials at hand, you’ll be well-equipped to embark on your watercolor skyline painting journey.

Introduction to watercolor sky painting

Watercolor sky painting allows you to unleash your creativity and explore the boundless possibilities of color, texture, and atmosphere. With each stroke of your brush, you can bring to life the ever-changing moods and movements of the sky, from the soft hues of a sunrise to the vibrant shades of a sunset, or even the mystical beauty of a starry night. By harnessing the fluidity and transparency of watercolors, you can create truly breathtaking and unique works of art that capture the essence of nature’s grandeur.


Throughout this tutorial, I will guide you step-by-step, sharing valuable insights, tips, and techniques that I have acquired through years of practice and experimentation. Whether you’re a seasoned watercolorist or a newcomer to the medium, this tutorial will equip you with the knowledge and skills necessary to elevate your watercolor sky paintings to new heights of artistic expression.

Choosing the right colors for your watercolor sky

One of the most captivating aspects of painting a watercolor sky is the ability to capture the ever-changing hues and tones that nature presents. From the soft pastels of a sunrise to the vibrant oranges and reds of a sunset, the sky offers an infinite palette of colors to explore. However, selecting the right colors can be a daunting task, especially for beginners. In this section, I’ll share some valuable insights to help you choose the perfect color combinations for your watercolor sky paintings.

  1. Understand the color wheel: Familiarize yourself with the basic color theory and the color wheel. This will help you understand how colors interact and complement each other, allowing you to create harmonious and visually appealing compositions.

  2. Start with a limited palette: When beginning, it’s best to work with a limited palette of colors. A basic set of primary colors (red, yellow, and blue) along with a few pastel tones (like pastel pink or pastel yellow) can be sufficient to create a dreamy sky colors.

  3. Consider the mood and atmosphere: The colors you choose should reflect the mood and atmosphere you want to convey in your painting. Cooler tones like blues and purples can create a serene and tranquil atmosphere, while warmer hues like oranges and reds can evoke a sense of energy and vibrancy.

Step 1

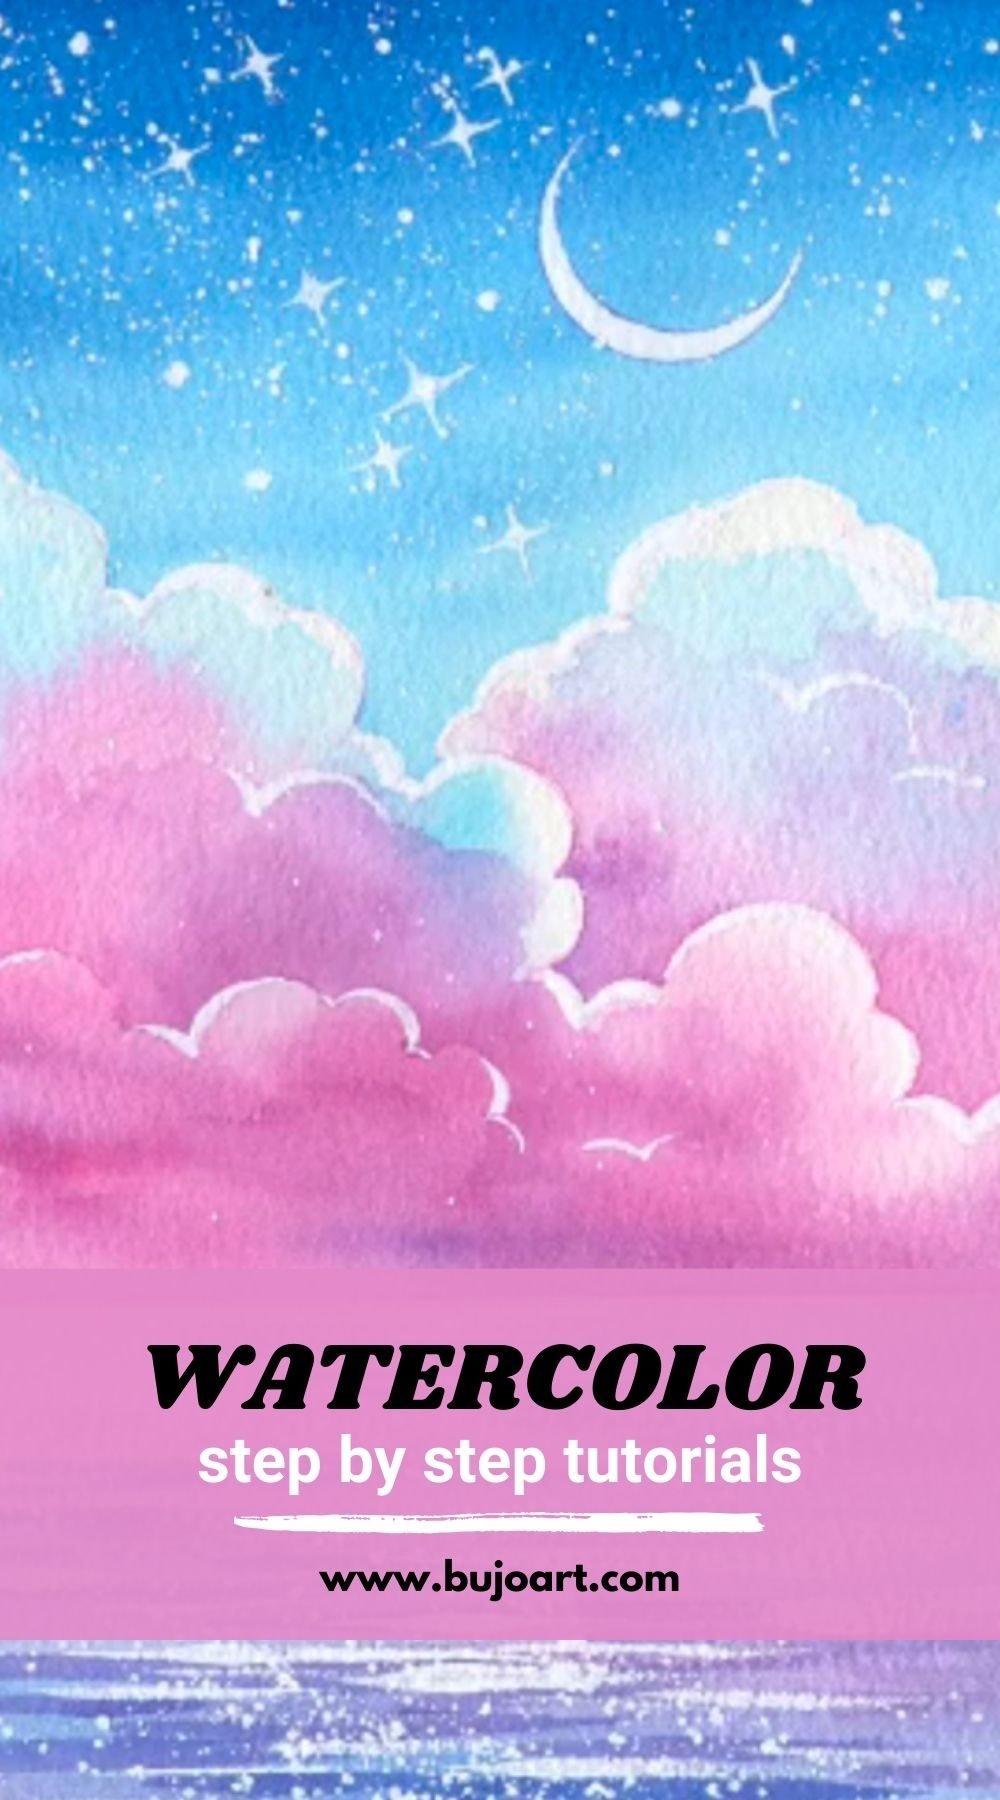
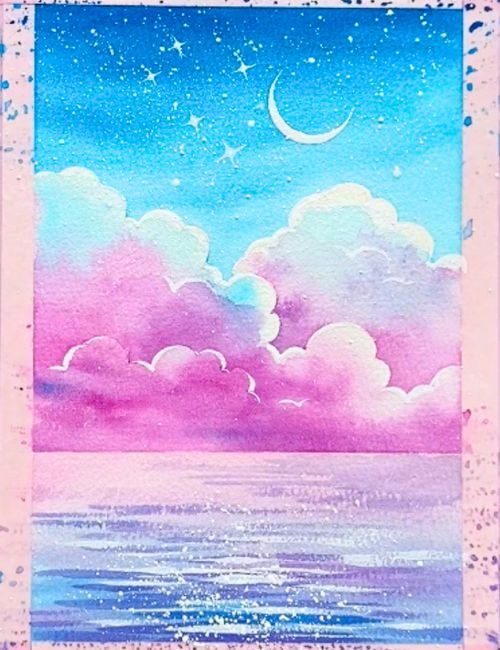
Sketch your composition: Use a pencil to lightly sketch the horizon line and layers of the clouds. This will serve as a guide for your painting process.
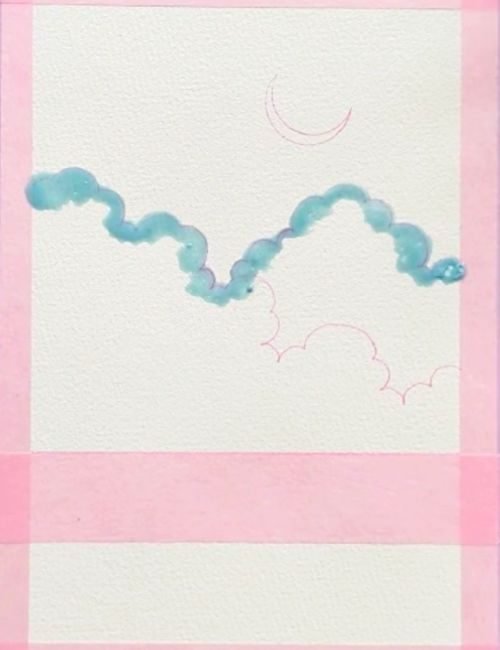
watercolor

Step 2

Paint the sky: Firstly, wet your paper with clean water using a flat brush on the sky area. Then paint the uppermost portion of your sky with a light, transparent wash of blue color. Use a large brush and work quickly to cover the entire area before the paper dries.

watercolor

Step 3

Create clouds: Wet the paper for the clouds area, and apply a thin wash of blue hue to the top layer of the clouds. Remember to leave the edge of the clouds untouched for the highlights.
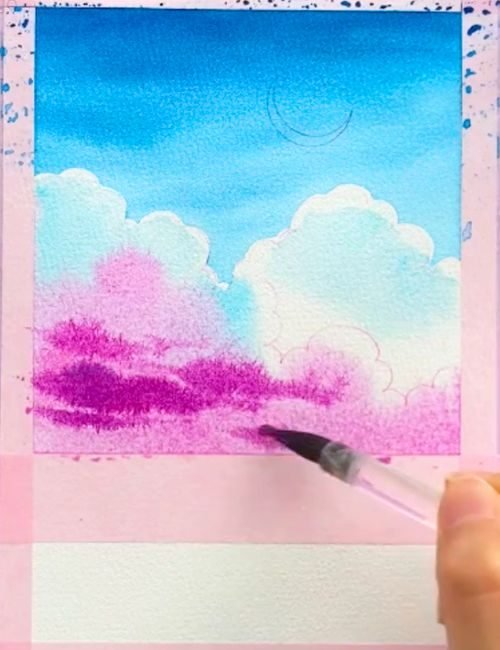
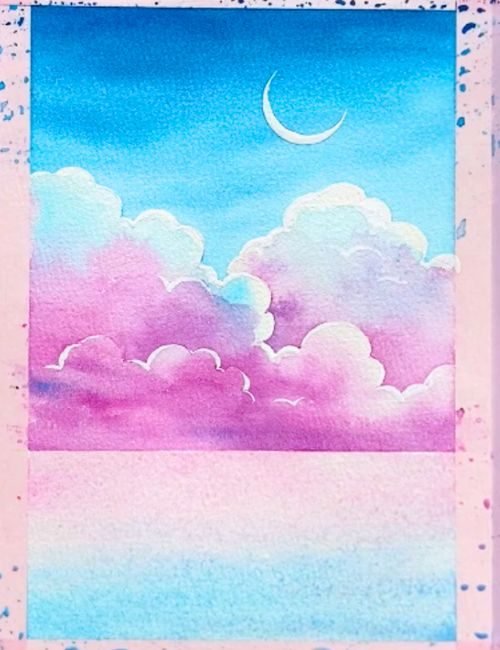
watercolor

Step 4

Blend and layer colors: While the initial wash is still damp, introduce pink and magenta to create depth and variation in your sky. Use a clean, damp brush to blend the colors together, creating a smooth transition from one hue to the next.
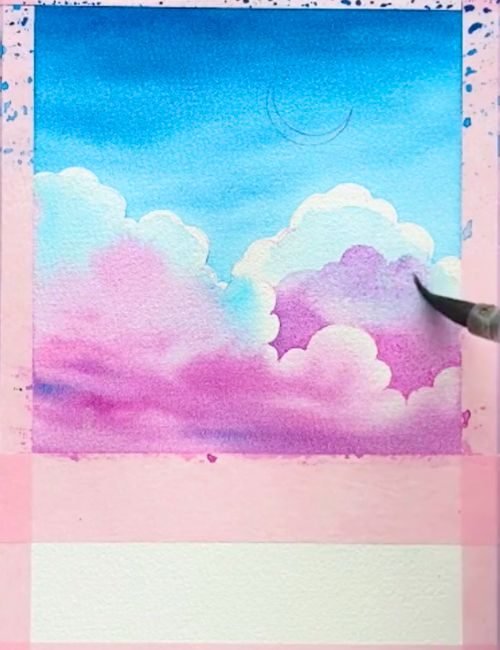
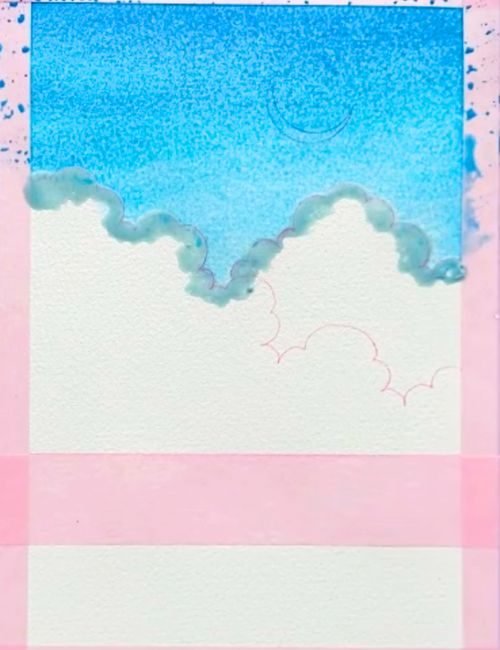
watercolor

Step 5

Create clouds: Once you've established the base colors for your clouds, it's time to define the details of the cloud. Use a dry brush technique or a clean, damp brush to create the desired cloud shapes and textures.
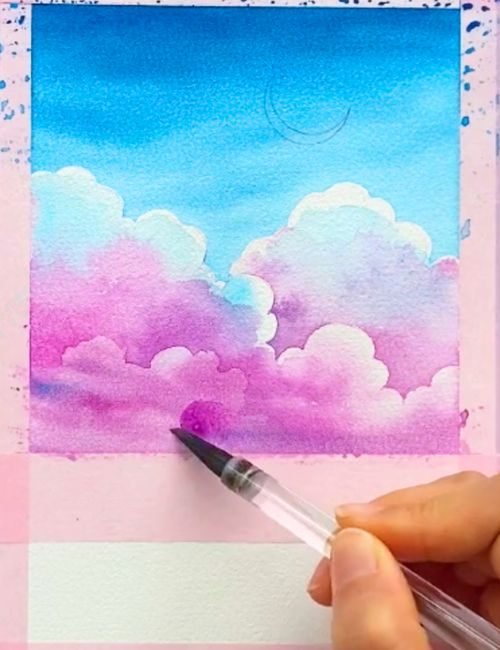
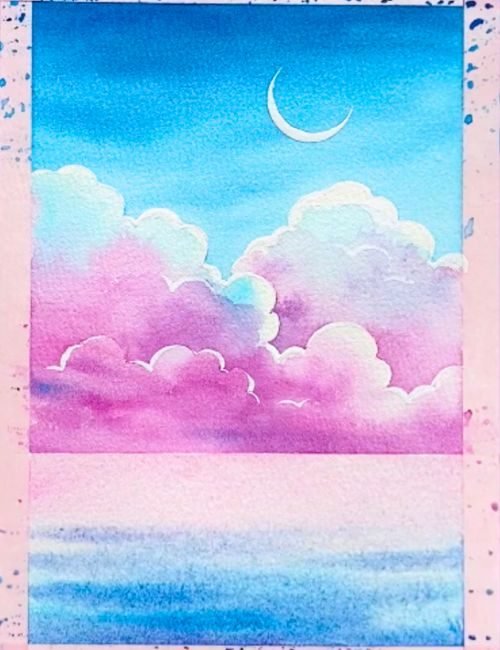
watercolor

Step 6

Repeat the process to finish painting the clouds: Remember, clouds can take on various forms, from fluffy and billowy to wispy and atmospheric. Slowly define the forms of all the clouds.
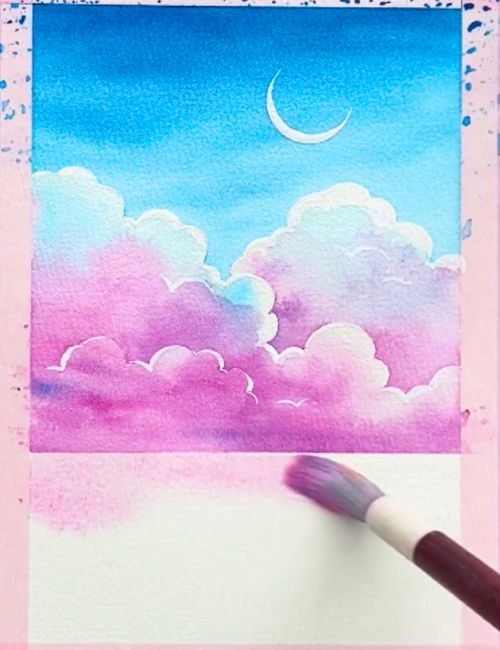
watercolor

Step 7

Paint the lake: Use big round brush to fill the lake area with your diluted pink hue.

watercolor

Step 8

Create the gradient effect: Gradually mix in the diluted blue hue to create the gradient effect.
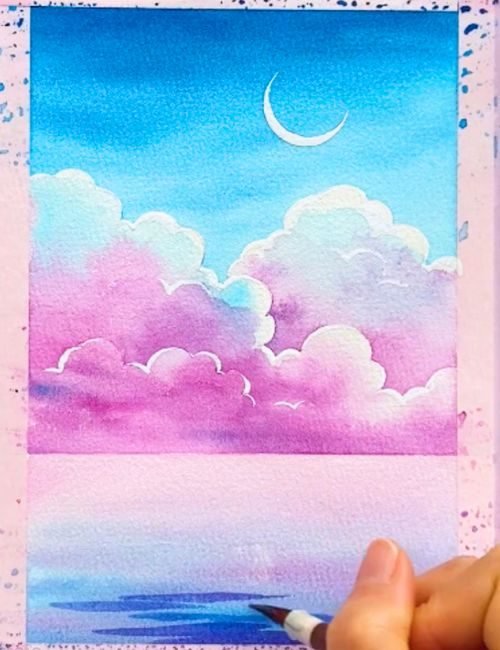
watercolor

Step 9

Paint the waves: While the wash is still damp, use a round brush to create the shapes of the waves. Start with the larger waves near the horizon line and gradually make them smaller as you move towards the bottom of the paper.

watercolor

Step 10

Paint the waves: Once the paper gets dried, apply the violet blue wash to the tops and crests of the waves, and create a sense of movement.
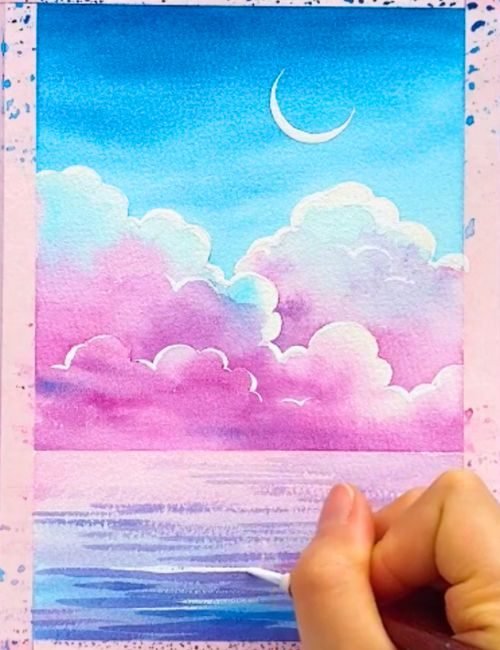
watercolor

Step 11

Paint the reflection effect: Load the same liner brush with white wash, and add white marks on top of the blue waves.

Step 12

Paint the moon and stars: Paint the moon and stars, adding any final touches or adjustments to enhance their luminosity and impact. Use a small, pointed brush to add subtle details to the stars and waves.

Unleash your creativity and create stunning watercolor skies

As we reach the end of this comprehensive guide, I hope you feel inspired and equipped to embark on your own watercolor sky painting journey. Throughout this tutorial, we’ve explored the enchanting world of watercolor sky painting, from choosing the right materials and colors to mastering advanced techniques and exploring different styles and variations.


Remember, the key to success in watercolor sky painting is practice, patience, and a willingness to experiment. Embrace the unpredictable nature of the medium, and let it guide you on a journey of self-discovery and artistic growth. Don’t be afraid to make mistakes; they are opportunities to learn and refine your skills.

Trending Posts

Follow Us

Welcome to Bujoart, where creativity knows no bounds! At Bujoart, we believe that art is not just a skill, but a form of expression. Whether you’re a seasoned artist or just starting out on your creative adventure, we have something for everyone.

Popular Articles
Newsletter
Subscribe for more!
Categories
Instagram
Facebook Group
Edit Template