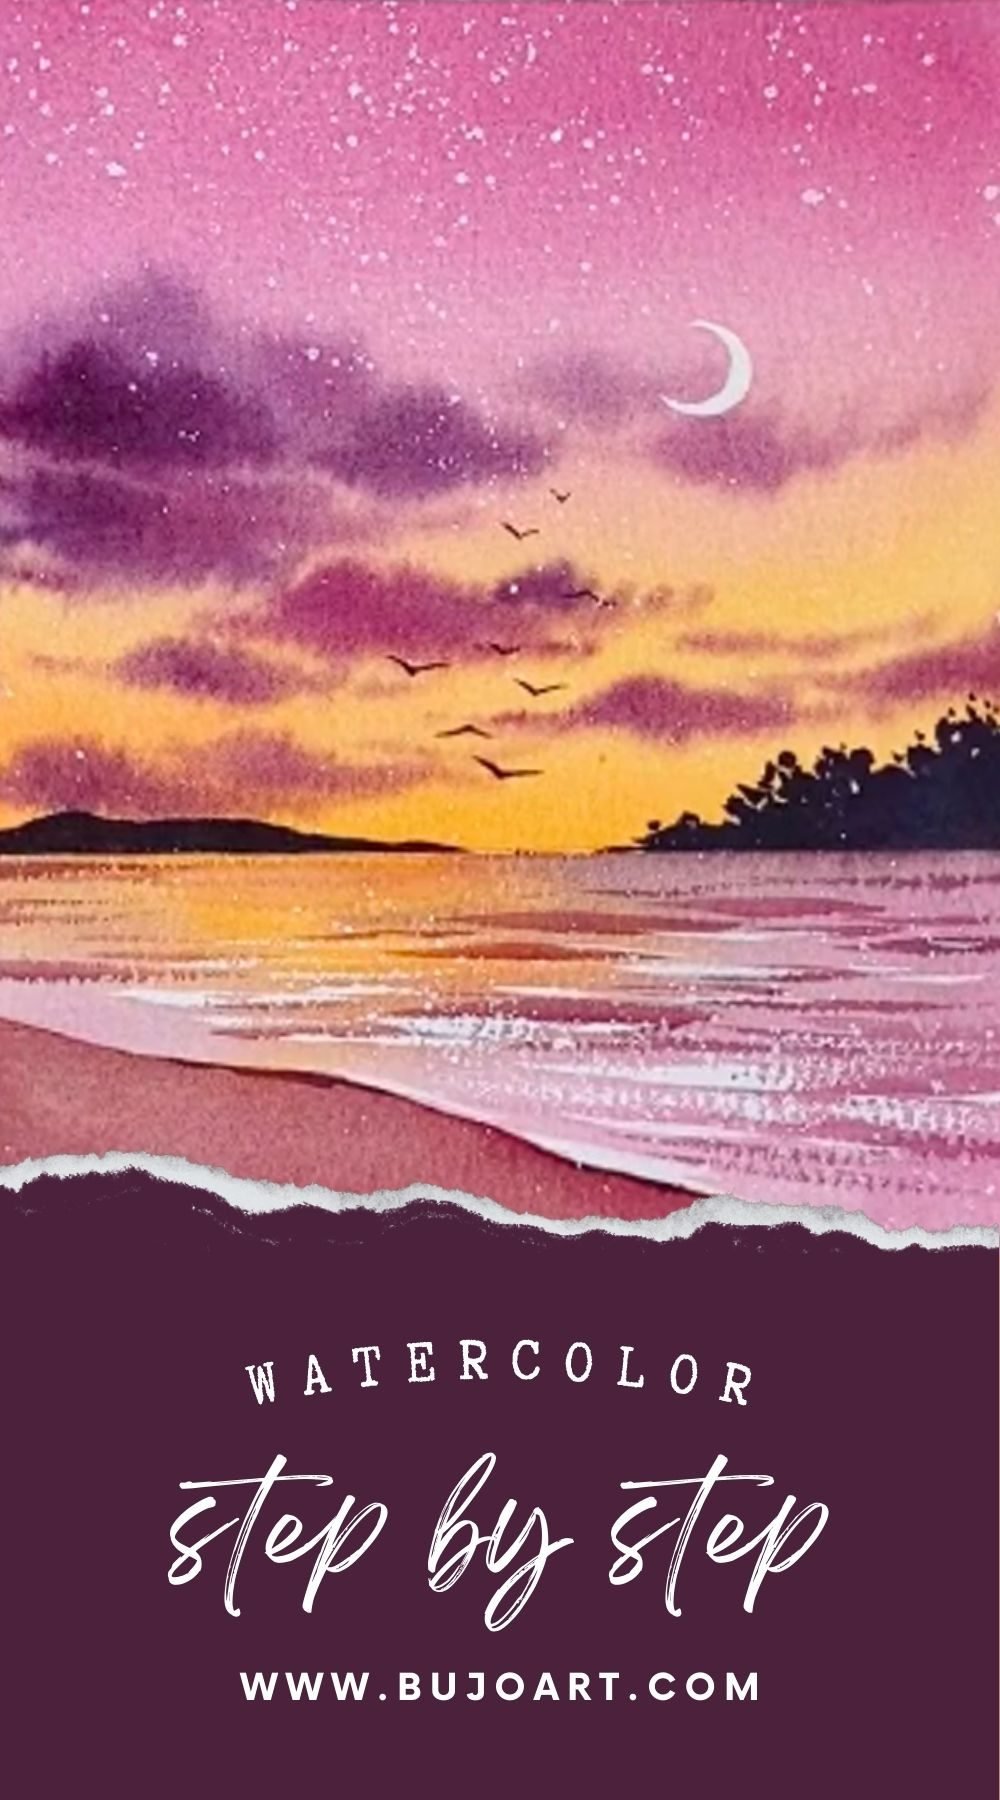
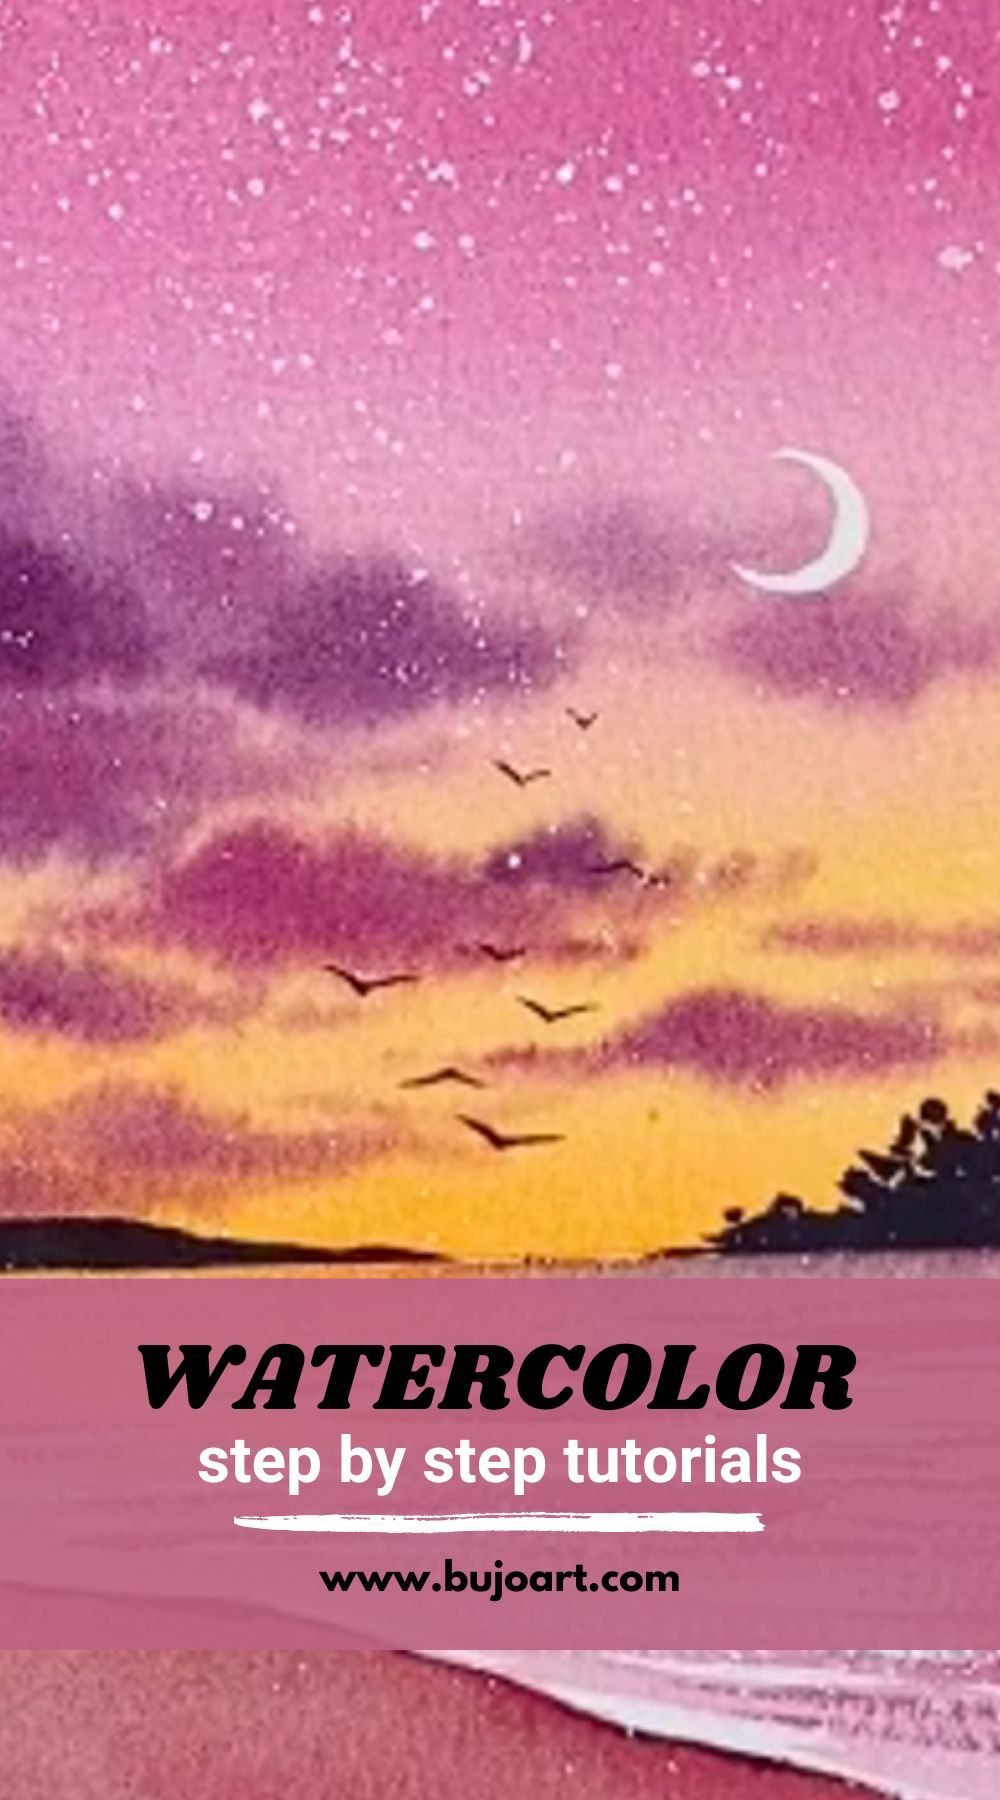
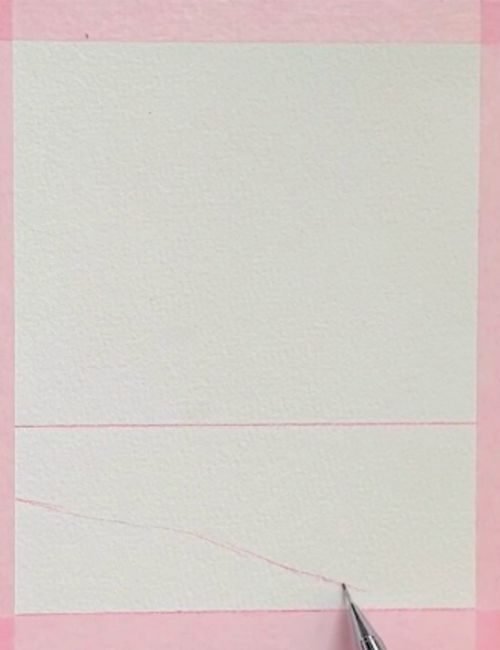
A Step-by-Step Tutorial for Creating a Serene Sunset on the Lake and Beach

Disclosure: This post contains affiliate links, meaning if you make a purchase via the links, we will earn a commission at no additional cost to you. Please read the full disclosure.

Disclosure:ย This post contains affiliate links, meaning if you make a purchase via the links, we will earn a commission at no additional cost to you. Please read the fullย disclosure.

watercolor

Before we begin, let’s gather the essential materials you’ll need for this watercolor tutorial:

With these materials at hand, you’ll be well-equipped to embark on your watercolor skyline painting journey.

Understanding sunset scenes on the lake

Before we delve into the step-by-step process, it’s essential to understand the key elements that contribute to the allure of sunset scenes on the lake. These elements include:

  1. Warm Hues: Sunsets are characterized by a vibrant palette of warm hues, ranging from fiery oranges and reds to soft pinks and purples. Capturing these hues accurately is crucial for creating a realistic and captivating sunset scene.

  2. Reflections: The still waters of a lake act as a natural mirror, reflecting the colors and patterns of the sky above. Capturing these reflections is a vital aspect of creating a compelling sunset scene, as they add depth and dimension to the painting.

  3. Atmospheric Perspective: As the sun sets, the atmosphere becomes hazy and diffused, creating a sense of depth and distance. Incorporating this atmospheric perspective into your painting will enhance the realistic and atmospheric quality of your sunset scene.

  4. Silhouettes: The silhouettes of trees, buildings, or other objects in the foreground can add drama and interest to your sunset scene. These silhouettes can be rendered as simple shapes or with intricate details, depending on your preference.

By understanding these key elements, you’ll be better equipped to create a stunning and captivating sunset scene on the lake.

Preparing your workspace and reference image

Clear your workspace: Ensure that you have a clean and organized workspace to avoid any unnecessary distractions or spills. Cover your work surface with a protective layer or a large sheet of paper to catch any paint drips or splatters.

Gather reference images: Collect high-quality reference images of sunset scenes on the lake. These images will serve as visual guides, helping you understand the colors, compositions, and atmospheric conditions you’ll be trying to capture. You can use photographs you’ve taken yourself or find inspiration from online sources or art books.

watercolor

Step 1

Lightly sketch the horizon line: Start by drawing a faint horizontal line across your watercolor paper to represent the horizon. This line will help you establish the separation between the sky and the lake. Using your reference images as a guide, lightly sketch the silhouettes of any objects you want to include in the foreground or background, such as trees, buildings, or boats. These silhouettes will add depth and interest to your painting.

watercolor

Step 2

Adding the first layer of colors to the sky: Start by mixing a range of warm hues on your palette, such as cadmium yellow, cadmium orange. Using a large, flat brush, apply a thin, even wash of your mixed colors to the sky area of your painting.
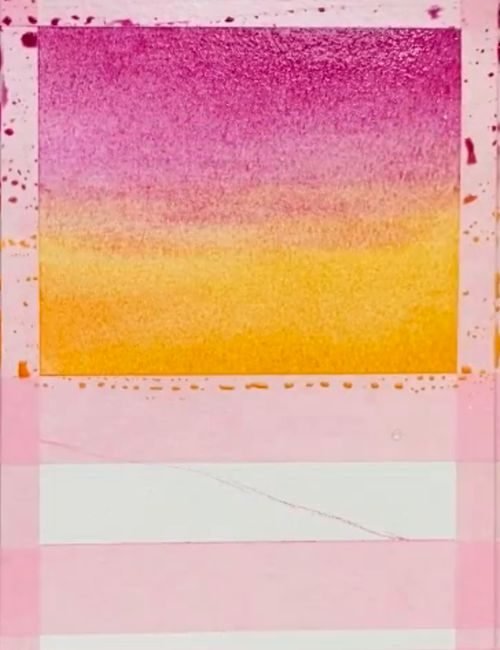
watercolor

Step 3

Create gradient effects of the sky: Start with the warmest hues at the horizon line and gradually transition to cooler hues as you move upwards. As you apply the wash, let the colors blend and mingle on the paper. This will create a beautiful, seamless transition between the different hues, mimicking the natural gradation of colors in a sunset sky.
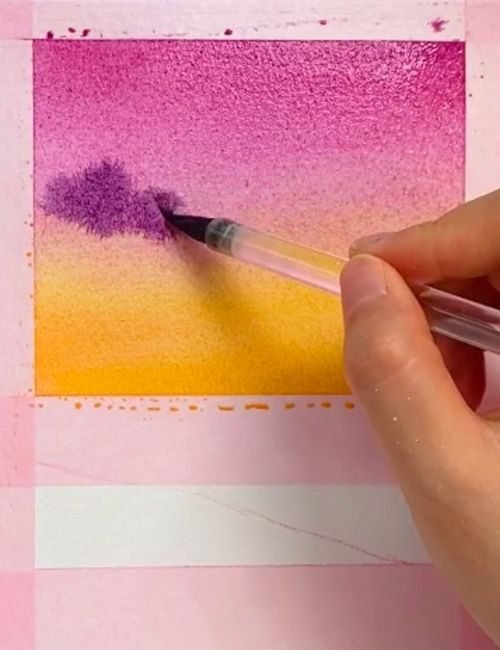
watercolor

Step 4

Add clouds: While the wash is still damp, you can add depth and texture by dropping in additional colors such as ultramarine violet to create the shapes of clouds.
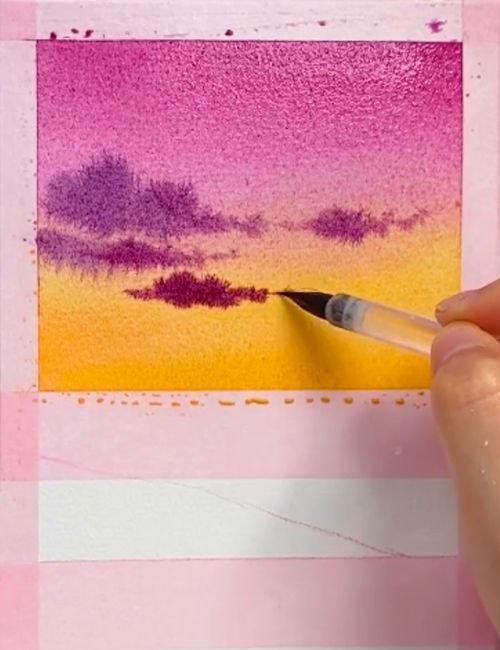
watercolor

Step 5

Create layers of clouds: Gradually add warmer tone into the clouds to create interesting patterns and variations in the sky.
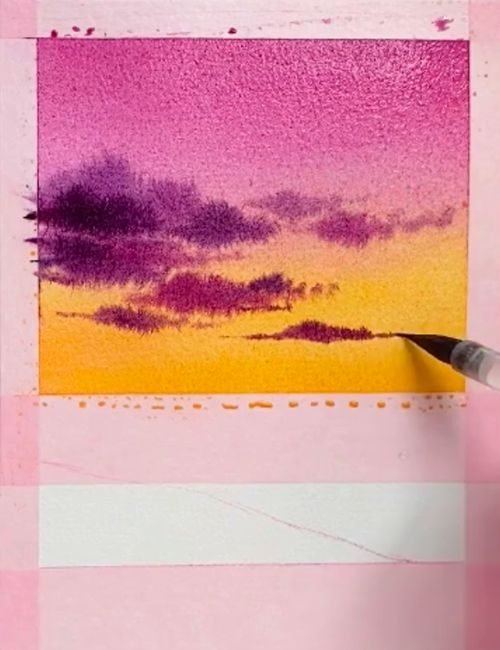
watercolor

Step 6

Finish painting the clouds: Repeat the process to create multiple layers of clouds. Now let it dry completely. Once you're satisfied with the sky, allow the paint to dry completely before moving on to the next step. This will prevent any unwanted mixing or bleeding of colors.
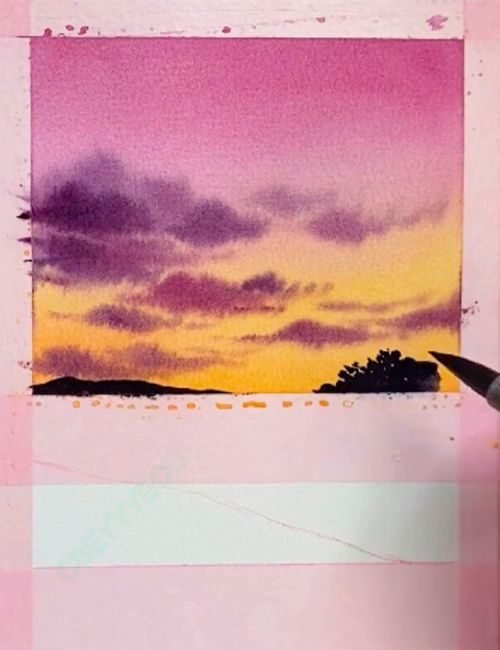
watercolor

Step 7

Add silhouette of trees and hills in the middle ground: Start by adding details to the mid-ground elements, such as trees or rocks. Use a smaller brush and mix appropriate colors to capture the textures and shapes of these elements. Remember to incorporate silhouettes or shadows to create depth and contrast.
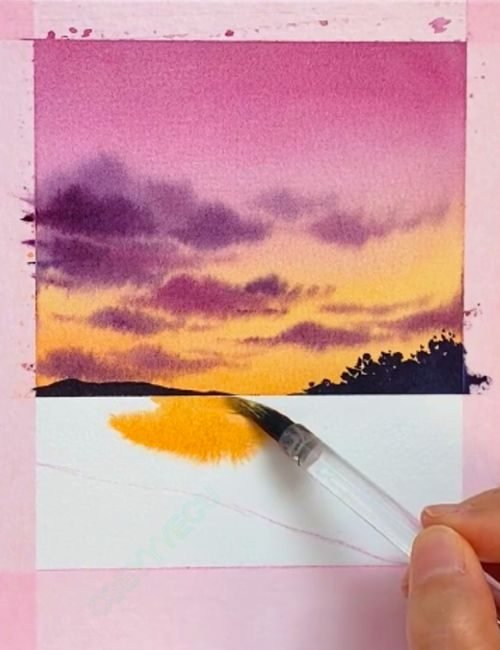
watercolor

Step 8

Mix your water colors: On your palette, mix a range of colors that correspond to the hues you used for the sky. Damp the the lake area with clear water and let the warm yellow paint flow freely to create a loose painting effects.
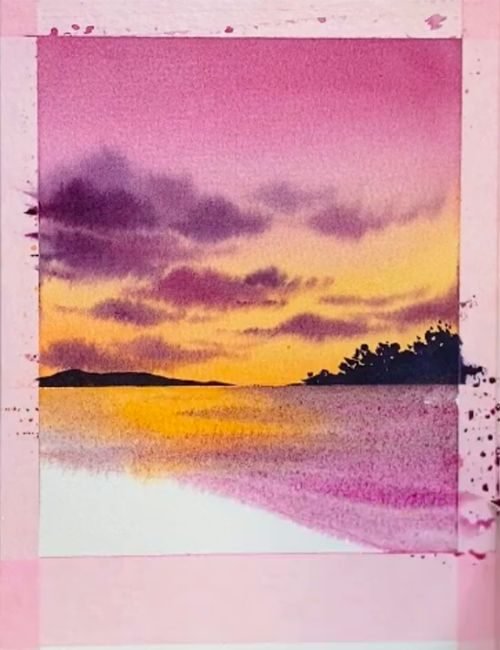
watercolor

Step 9

Apply the reflections: Using a clean, damp brush, apply the mixed colors to the water area of your painting. Start by painting the reflections directly below the corresponding colors in the sky, gradually blending and softening the edges as you move downwards.
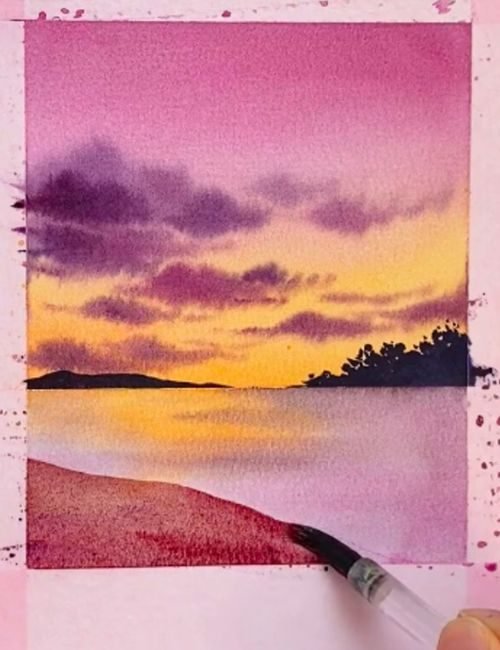
watercolor

Step 10

Add the beach: Mix a thin wash of maroon color and apply it to the beach area. Dilute the color with more water to achieve the translucent effect.
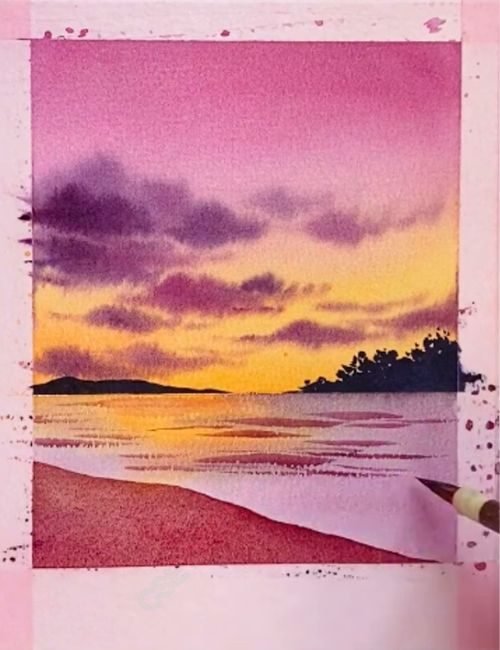
watercolor

Step 11

Incorporate distortions and ripples: You can achieve this by gently lifting out pigment with a clean, damp brush or paper towel, or by adding subtle brushstrokes to create the illusion of movement on the water's surface.
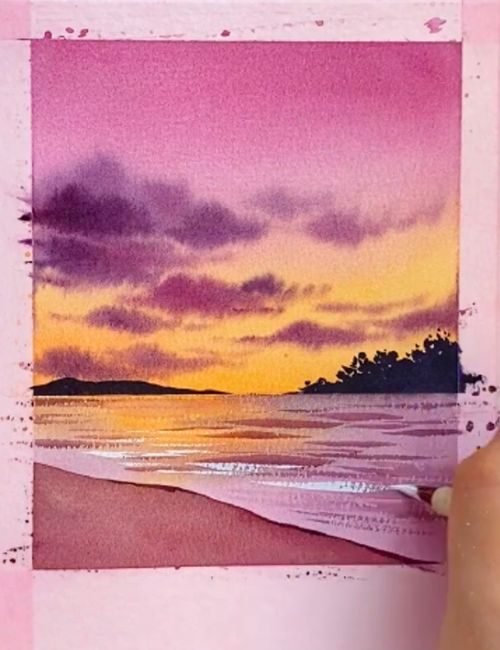
watercolor

Step 12

Apply the reflections: Using a clean, damp brush, apply the white color to the water waves area of your painting with dry brush stokes.
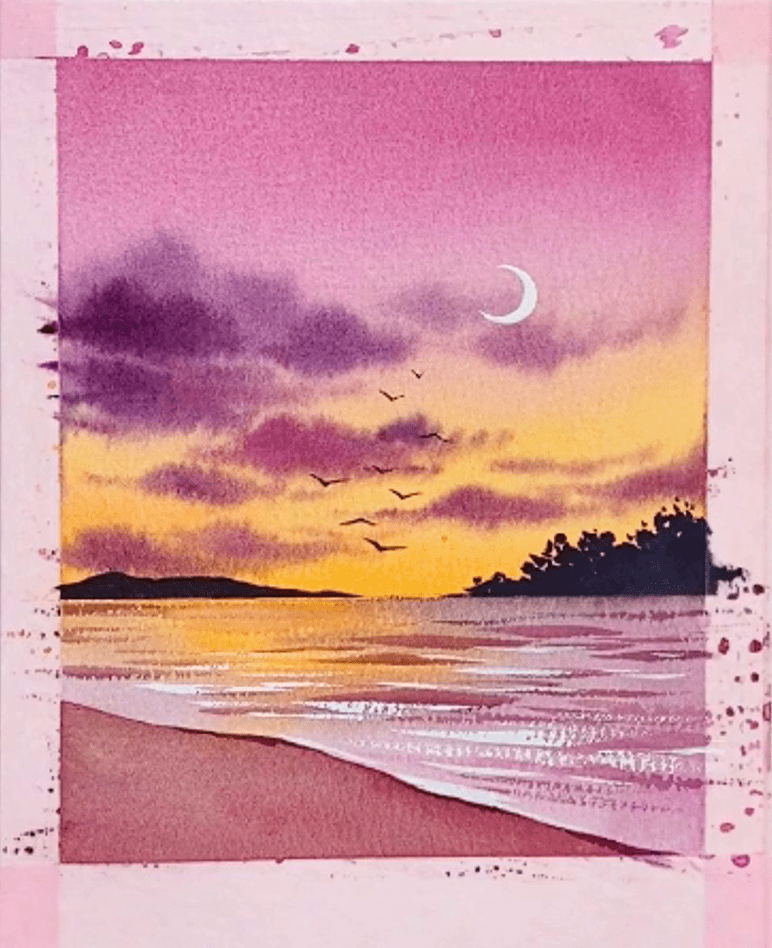
watercolor

Step 13

Add the moon and birds: Using a clean, damp brush, use the white color to paint the moon.
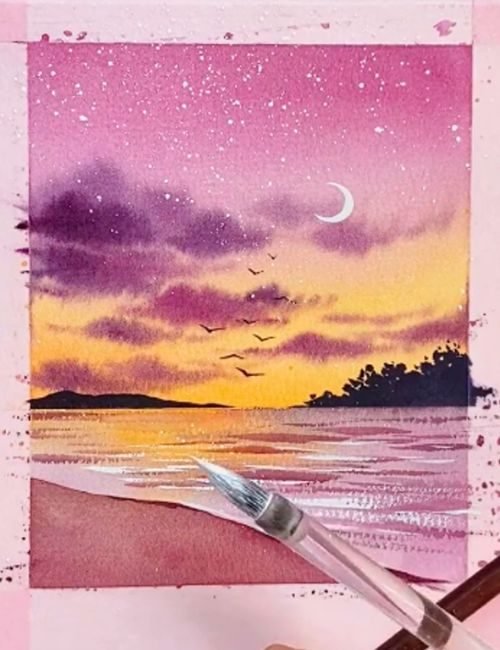
watercolor

Step 14

Add finishing touches: Once you've added the main details, consider adding any final touches or accents to enhance the overall composition. This could include highlights, shadows, or subtle textures to add depth and interest.

Tips and tricks for capturing captivating sunset scenes

Throughout this tutorial, we’ve explored the step-by-step process of creating a captivating sunset scene on the lake using watercolors. However, there are a few additional tips and tricks that can help you elevate your painting and capture the essence of these breathtaking moments:

  1. Observe and study sunsets in person: While reference images are invaluable, there’s nothing quite like observing a sunset in person. Take the time to study the colors, atmospheric conditions, and the way the light interacts with the water and surroundings. This firsthand experience will inform your painting and help you capture the true essence of the moment.

  2. Experiment with different techniques: Watercolor painting offers a wide range of techniques, from wet-on-wet to dry brushing, and everything in between. Don’t be afraid to experiment and try new techniques to create unique textures and effects in your sunset scenes.

  3. Consider the mood and atmosphere: Sunsets are not just about the colors; they also evoke a certain mood and atmosphere. Think about the emotions you want to convey in your painting and adjust your color choices, brushstrokes, and composition accordingly.

  4. Embrace imperfections: Watercolor painting is a fluid and unpredictable medium, and embracing the imperfections and happy accidents can lead to beautiful and unique results. Don’t be afraid to let go of complete control and allow the paint to guide you in unexpected directions.

Conclusion and final thoughts on the tutorial

As we come to the end of this comprehensive tutorial, I hope you feel inspired and equipped to create your own captivating sunset scenes on the lake using watercolors. Throughout this journey, we’ve explored the key elements that contribute to the allure of these scenes, gathered the necessary materials, and delved into a step-by-step process to bring your vision to life.

Remember, watercolor painting is a journey of exploration and self-expression. Embrace the fluidity and unpredictability of the medium, and allow your creativity to flow freely. Each sunset scene you paint will be unique, capturing not only the beauty of nature but also your personal interpretation and artistic voice.

If you’re ready to take your watercolor skills to the next level and create breathtaking sunset scenes on the lake, consider enrolling in one of our comprehensive online courses. Our expert instructors will guide you through advanced techniques, color theory, and composition, ensuring that you have the tools and knowledge to bring your artistic vision to life. Visit our website today and explore our course offerings to find the perfect fit for your artistic journey.

Trending Posts

Follow Us

Welcome to Bujoart, where creativity knows no bounds! At Bujoart, we believe that art is not just a skill, but a form of expression. Whether you’re a seasoned artist or just starting out on your creative adventure, we have something for everyone.

Popular Articles
Newsletter
Subscribe for more!
Categories
Instagram
Facebook Group
Edit Template