Disclosure: This post contains affiliate links, meaning if you make a purchase via the links, we will earn a commission at no additional cost to you. Please read the full disclosure.
Before we begin, let’s gather the essential materials you’ll need for this watercolor tutorial:
- Watercolor paper (cold-pressed or rough surface) : Winsor&Newton, Arches, Arteza, Artisto sketchbook
- Watercolor paints Paul Rubens, Winsor & Newton, Mozart, Kuratake, LightWish, Mungyo
- Watercolor brushes (round and flat brushes in various sizes): Artegria, Nicpro, Arteza
- Pencil and eraser: Pental, Uniball, Blackwing, Luechtturm
- Water container: Faber-Castell, MylifeUnite
- Paper towels or a rag
- Masking fluid (optional) : JoFook, Mont Marte, Schmincke, Winsor&Newton
- Ruler (optional): Geometer set
With these materials at hand, you’ll be well-equipped to embark on your watercolor skyline painting journey.
Introduction to the Pink Aurora Mountain Watercolor painting
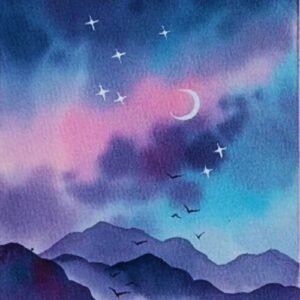
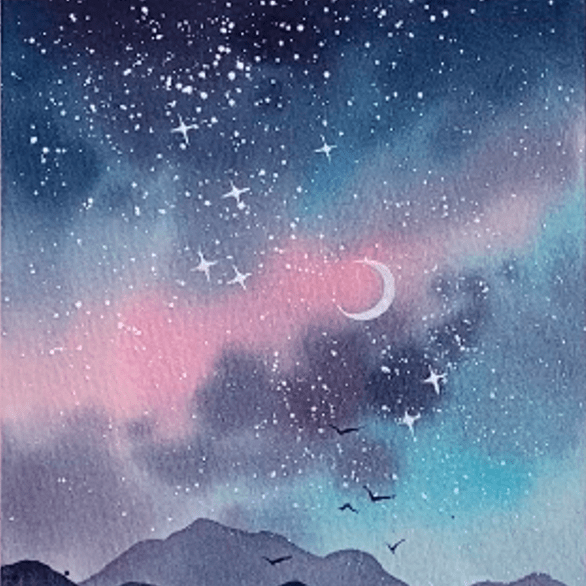
Greetings, fellow artists! Today, I’m thrilled to embark on a captivating journey with you, where we’ll explore the mesmerizing world of watercolor painting and create a breathtaking masterpiece – the Pink Aurora Mountain. Imagine a serene mountain landscape bathed in the ethereal glow of the Northern Lights, with hues of pink and purple dancing across the canvas. This painting promises to be a feast for the senses and a true testament to the beauty of nature.
In this comprehensive guide, I’ll walk you through every step, from gathering the necessary materials to mastering the techniques required to capture the essence of the aurora borealis. Whether you’re a seasoned watercolorist or a budding artist, this project will challenge and inspire you, igniting a newfound appreciation for the magic of watercolors.
So, let’s dive in and unleash our creativity as we bring the Pink Aurora Mountain to life on our canvases!

Step 1
Sketch the outline: Using a pencil, lightly sketch the outline of the mountain range on your paper. This will serve as a guide for your painting. Before applying any paint, wet the entire surface of the paper with clean water. This will help the colors blend seamlessly and create a smooth transition between hues.

Step 2
Paint the sky: Begin by painting the sky area with a mix of purple and blue hues. Use a wet-on-wet technique, allowing the colors to blend naturally on the paper.

Step 3
Blend multiple colors: Add hints of pink and light blue to create the illusion of the aurora borealis.

Step 4
Enhance the depth of the sky: While the paper is still wet, add some dark paints in the middle of the sky. Allow the colors to bleed into the sky, creating a seamless transition. And Wait for the paper to get dried.

Step 5
Create the mountain silhouette: While the sky is still damp, use a darker shade of purple or blue to paint the silhouette of the mountains.

Step 6
Add depth to the mountains: Once the initial mountain silhouette is dry, start adding depth and texture to the mountain range. Use a combination of darker and lighter shades of purple, blue, and pink to create the second layer of the mountain.

Step 7
Layer the mountains: Use a combination of darker and lighter shades of purple, blue, and pink to create the layers of the mountains.

Step 8
Refine the details: As the painting progresses, take the time to refine the details and add finishing touches. Use a smaller brush to add a moon, stars and define the mountain peaks.
Step 9
Add final highlights: Once you're satisfied with the overall composition, use a small brush and a touch of white paint to add final highlights to the mountains and the aurora borealis, creating a sense of depth and luminosity.
Enhancing the watercolor painting with additional elements
While the Pink Aurora Mountain and the captivating aurora borealis are the main focal points of our painting, adding additional elements can take your artwork to new heights. Here are some ideas to consider:
Incorporate celestial elements: Painting stars, planets, or even a crescent moon can add a touch of whimsy and depth to your night sky.
Include wildlife: Silhouettes of animals like bears, wolves, or birds can add a sense of life and storytelling to your mountain landscape.
Add a human element: Consider painting a small cabin, a tent, or even a solitary figure gazing up at the Northern Lights to create a sense of scale and wonder.
Experiment with water features: Incorporating a serene lake, a winding river, or even a waterfall can add depth and dimension to your composition.
Incorporate trees or vegetation: Painting trees, shrubs, or wildflowers in the foreground can provide a sense of depth and grounding to your mountain scene.
Play with atmospheric effects: Adding elements like mist, clouds, or even a subtle aurora glow on the mountain peaks can create a dreamlike and atmospheric quality to your painting.
Remember, the key to successfully incorporating additional elements is to maintain balance and harmony within your composition. Each element should complement and enhance the overall scene, rather than detract from the main focal point – the Pink Aurora Mountain and the ethereal aurora borealis.
Conclusion and final thoughts on creating a stunning Pink Aurora Mountain Watercolor painting
As we reach the end of our journey, I hope you feel inspired and empowered to create your own stunning Pink Aurora Mountain Watercolor masterpiece. Throughout this guide, we’ve explored the captivating world of watercolor painting, delved into the techniques required to capture the ethereal beauty of the aurora borealis, and discussed ways to enhance your mountain landscape with additional elements.
Creating a work of art like this is not just a testament to your artistic skills but also a celebration of the natural wonders that surround us. The Northern Lights, with their mesmerizing dance of colors and otherworldly beauty, have captivated humans for centuries, and now you have the opportunity to immortalize this phenomenon on canvas.
Remember, the key to success in watercolor painting lies in patience, practice, and a willingness to experiment. Embrace the unpredictable nature of this medium, and let the colors guide you on a journey of self-expression and creativity.
As you continue to hone your skills and explore new techniques, don’t hesitate to share your Pink Aurora Mountain Watercolor masterpieces with the world. Participate in local art exhibitions, join online communities, or simply display your work proudly in your home or office. Your art has the power to inspire others and ignite a newfound appreciation for the beauty that surrounds us.
If you’re feeling inspired and ready to embark on your own watercolor journey, consider joining our online art community. We offer a wide range of resources, tutorials, and workshops to help you develop your skills and connect with fellow artists from around the world. By joining our community, you’ll gain access to a supportive network of artists, valuable feedback, and endless inspiration to fuel your creative endeavors. Don’t miss out on this opportunity to elevate your watercolor painting skills and embrace the joy of creating beautiful art. Sign up today and let your artistic journey begin!
In the end, the true beauty of watercolor painting lies not only in the finished piece but also in the process itself. Embrace the challenges, savor the moments of triumph, and let each stroke of your brush be a celebration of the vibrant world around you. The Pink Aurora Mountain Watercolor is just the beginning – a gateway to a lifetime of artistic exploration and self-expression.
So, gather your brushes, mix your colors, and let your creativity soar. The canvas awaits, and the Northern Lights are calling. It’s time to create a masterpiece that will leave a lasting impression on all who witness its beauty. Happy painting, my fellow artists!


