Drawing the human body is a fundamental skill for any artist, whether you’re interested in traditional art, digital illustration, or even animation. This comprehensive guide will walk you through the essential techniques and principles of body drawing, helping you develop your skills and create more realistic and dynamic figures. From understanding anatomy to mastering proportions, we’ll cover everything you need to know to draw bodies like a pro.
Understanding Human Anatomy: The Foundation of Body Drawing
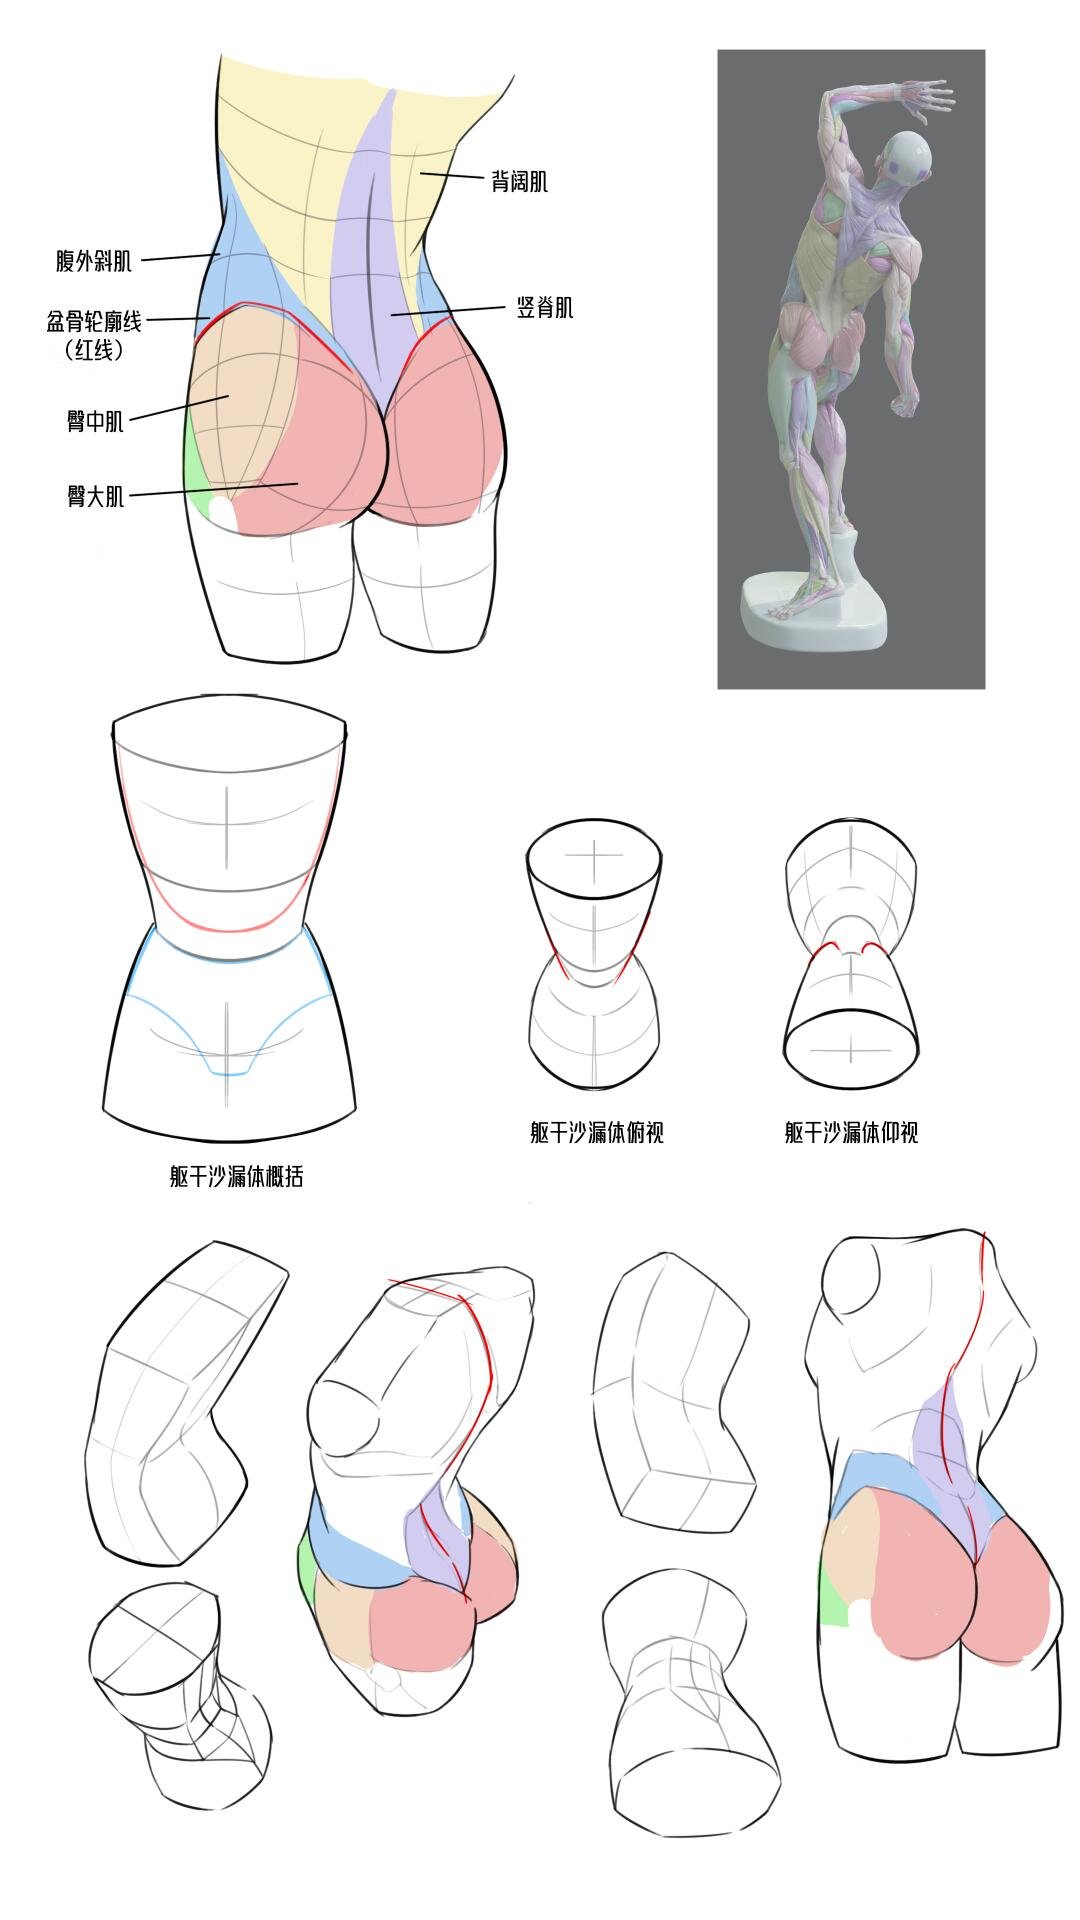
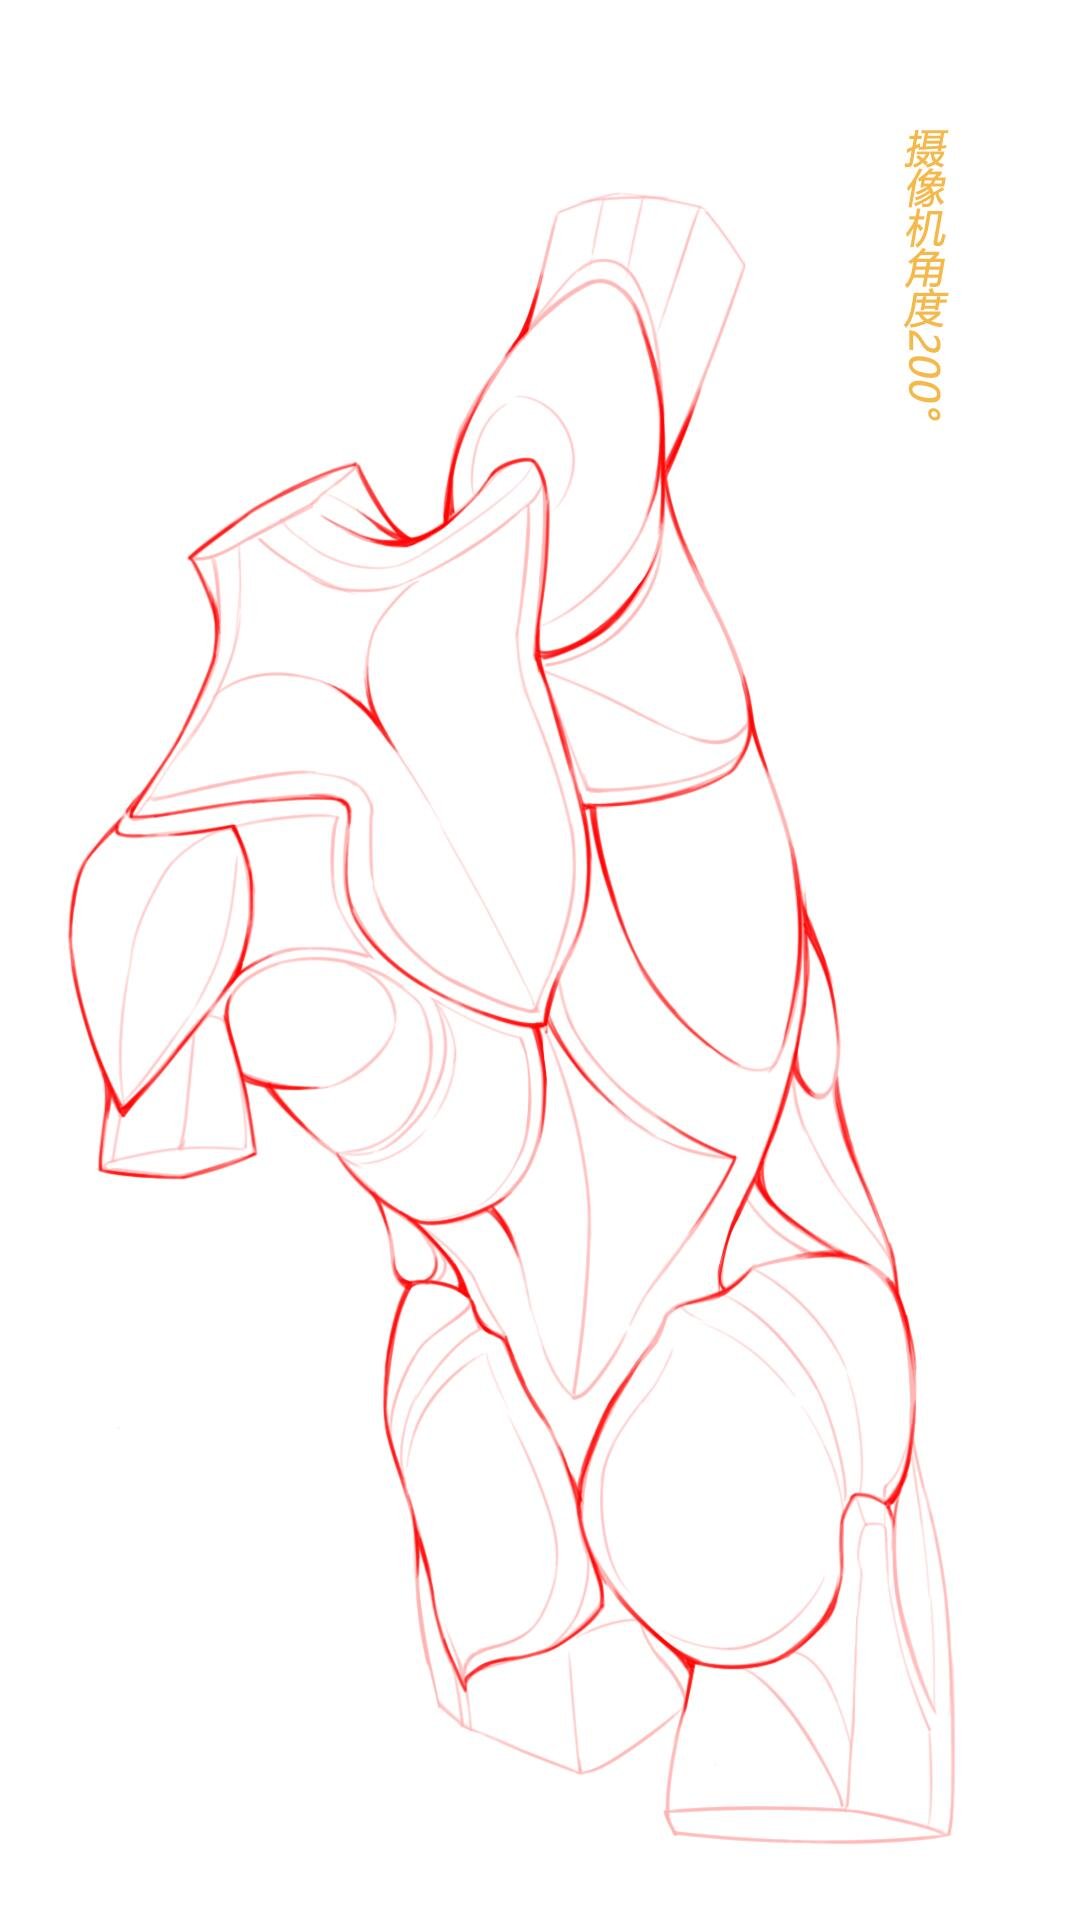
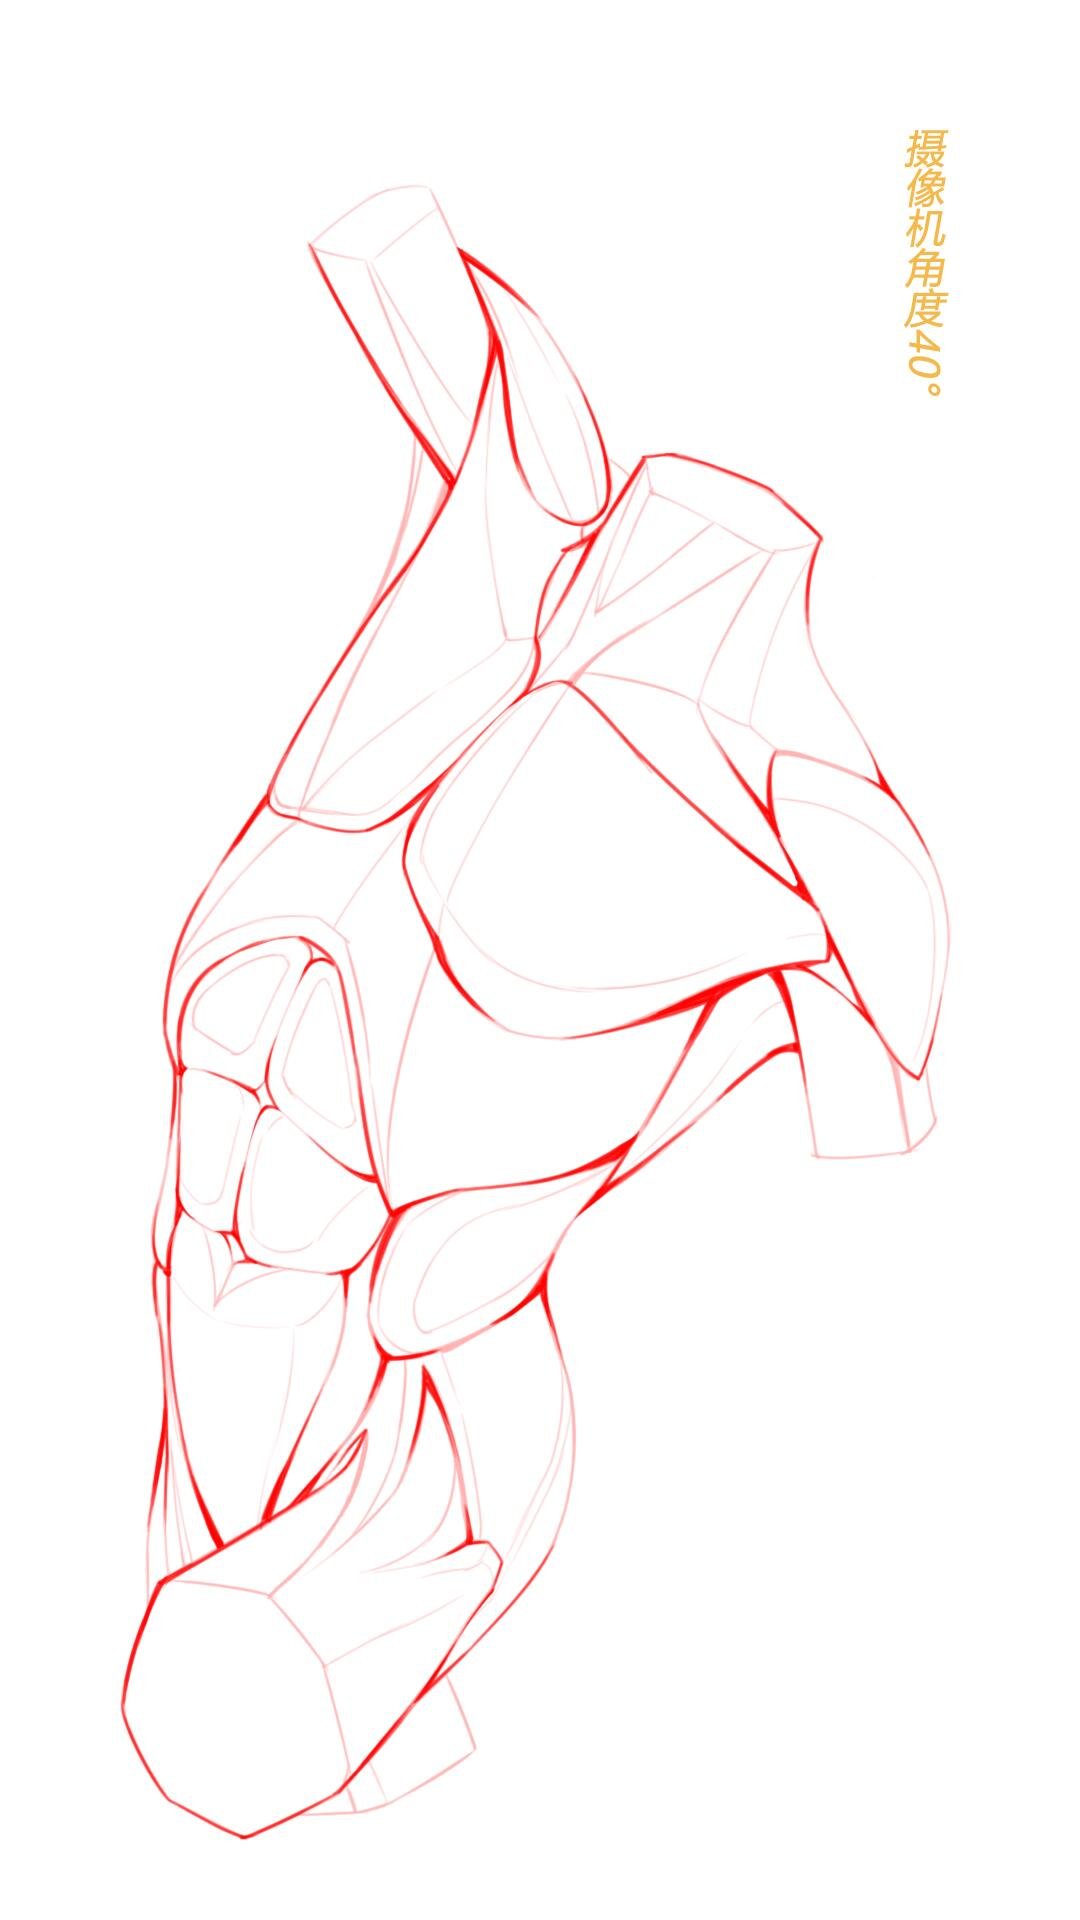
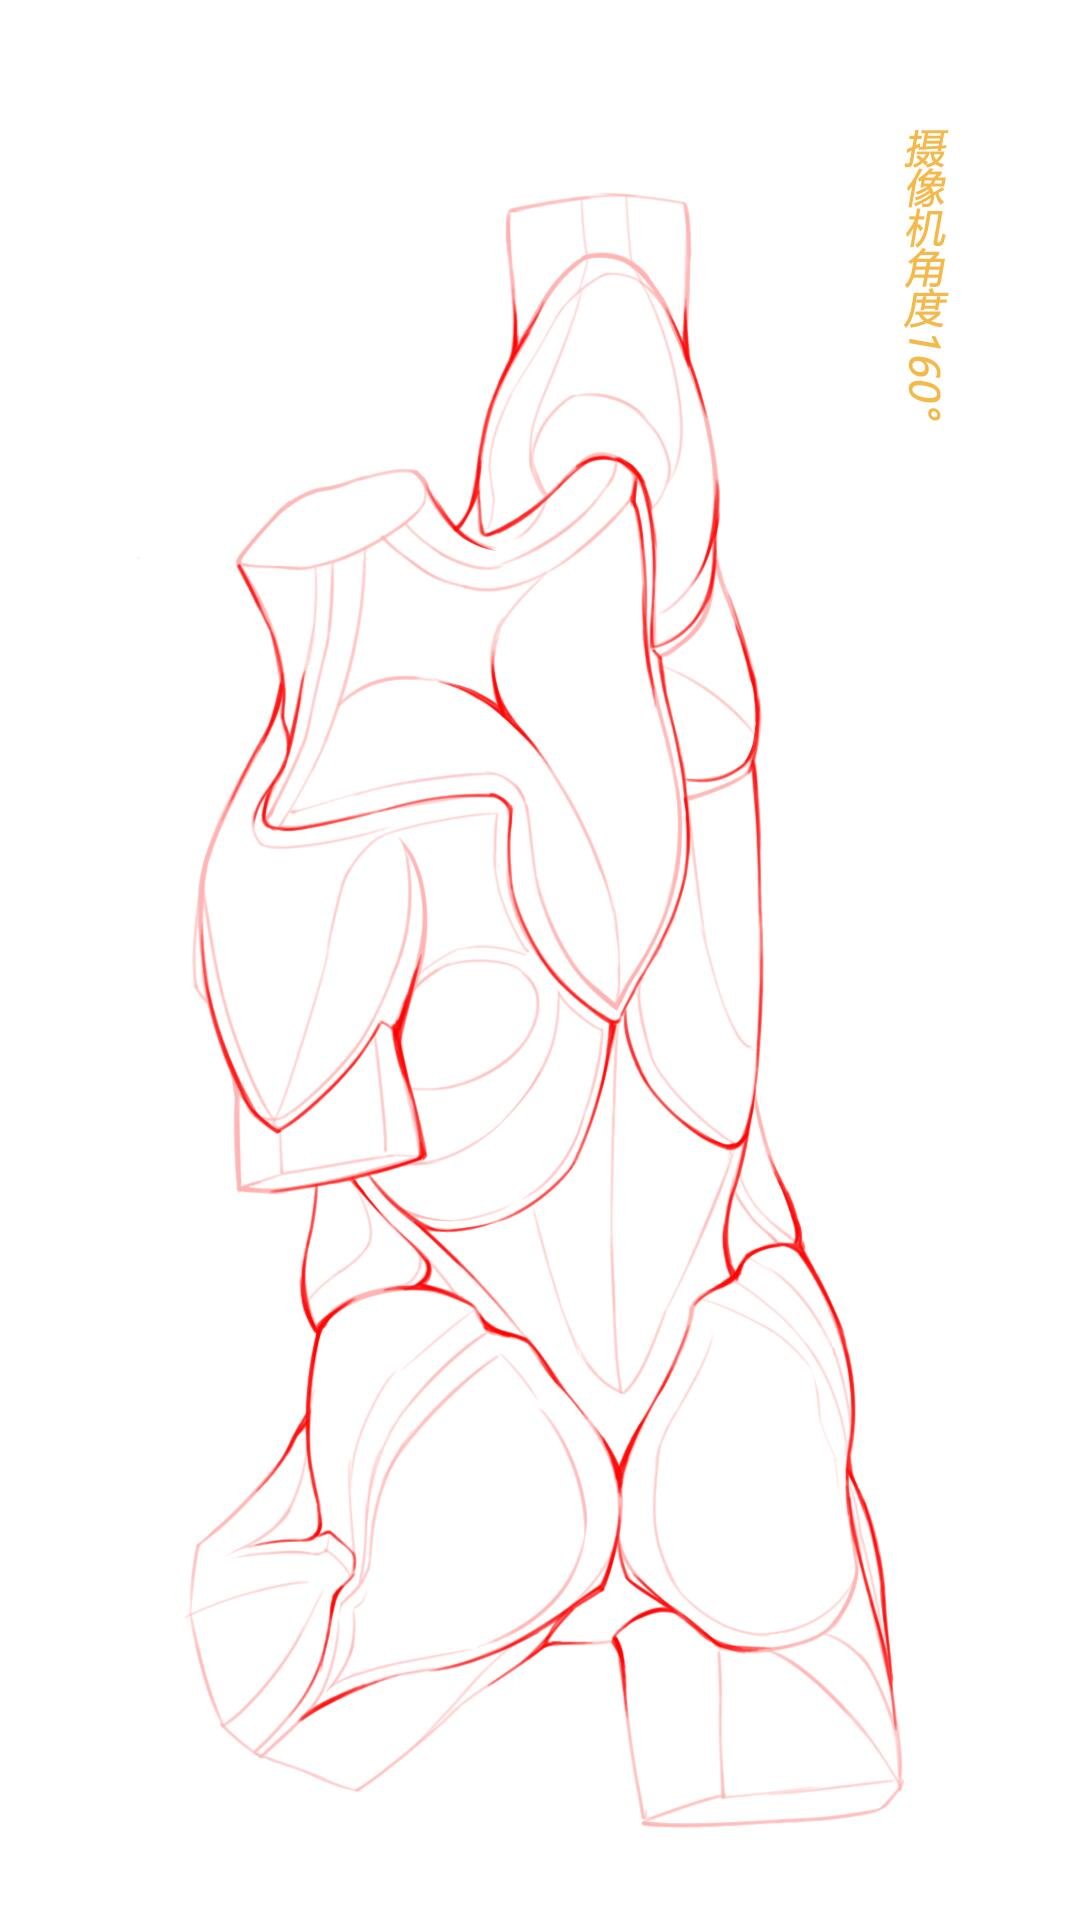
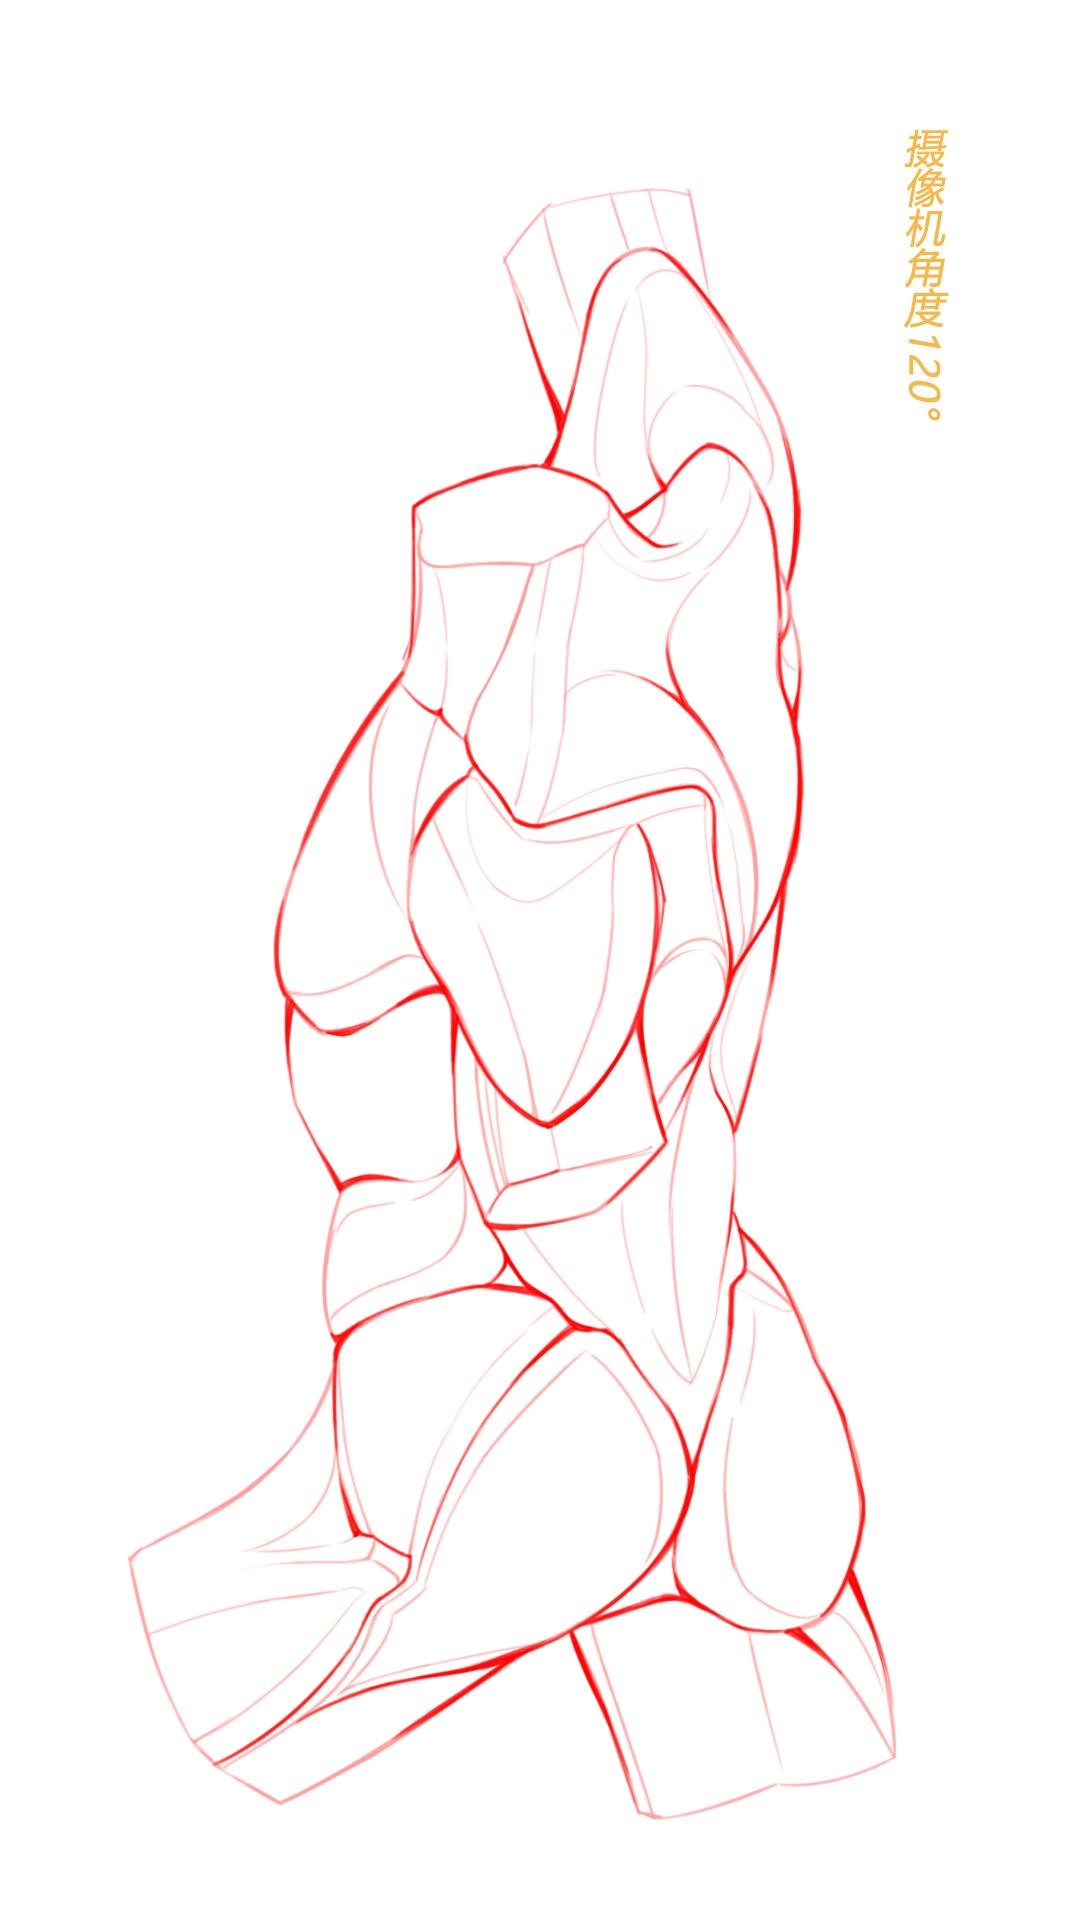
To draw a convincing human body, you must first understand its underlying structure. Anatomy knowledge is crucial for creating realistic figures and capturing the nuances of human form. Here’s what you need to know:
-
Skeletal Structure: The skeleton forms the foundation of the body. Familiarize yourself with the major bones, including the skull, spine, ribcage, pelvis, and limbs. Understanding how these bones connect and move will help you create more accurate poses.
-
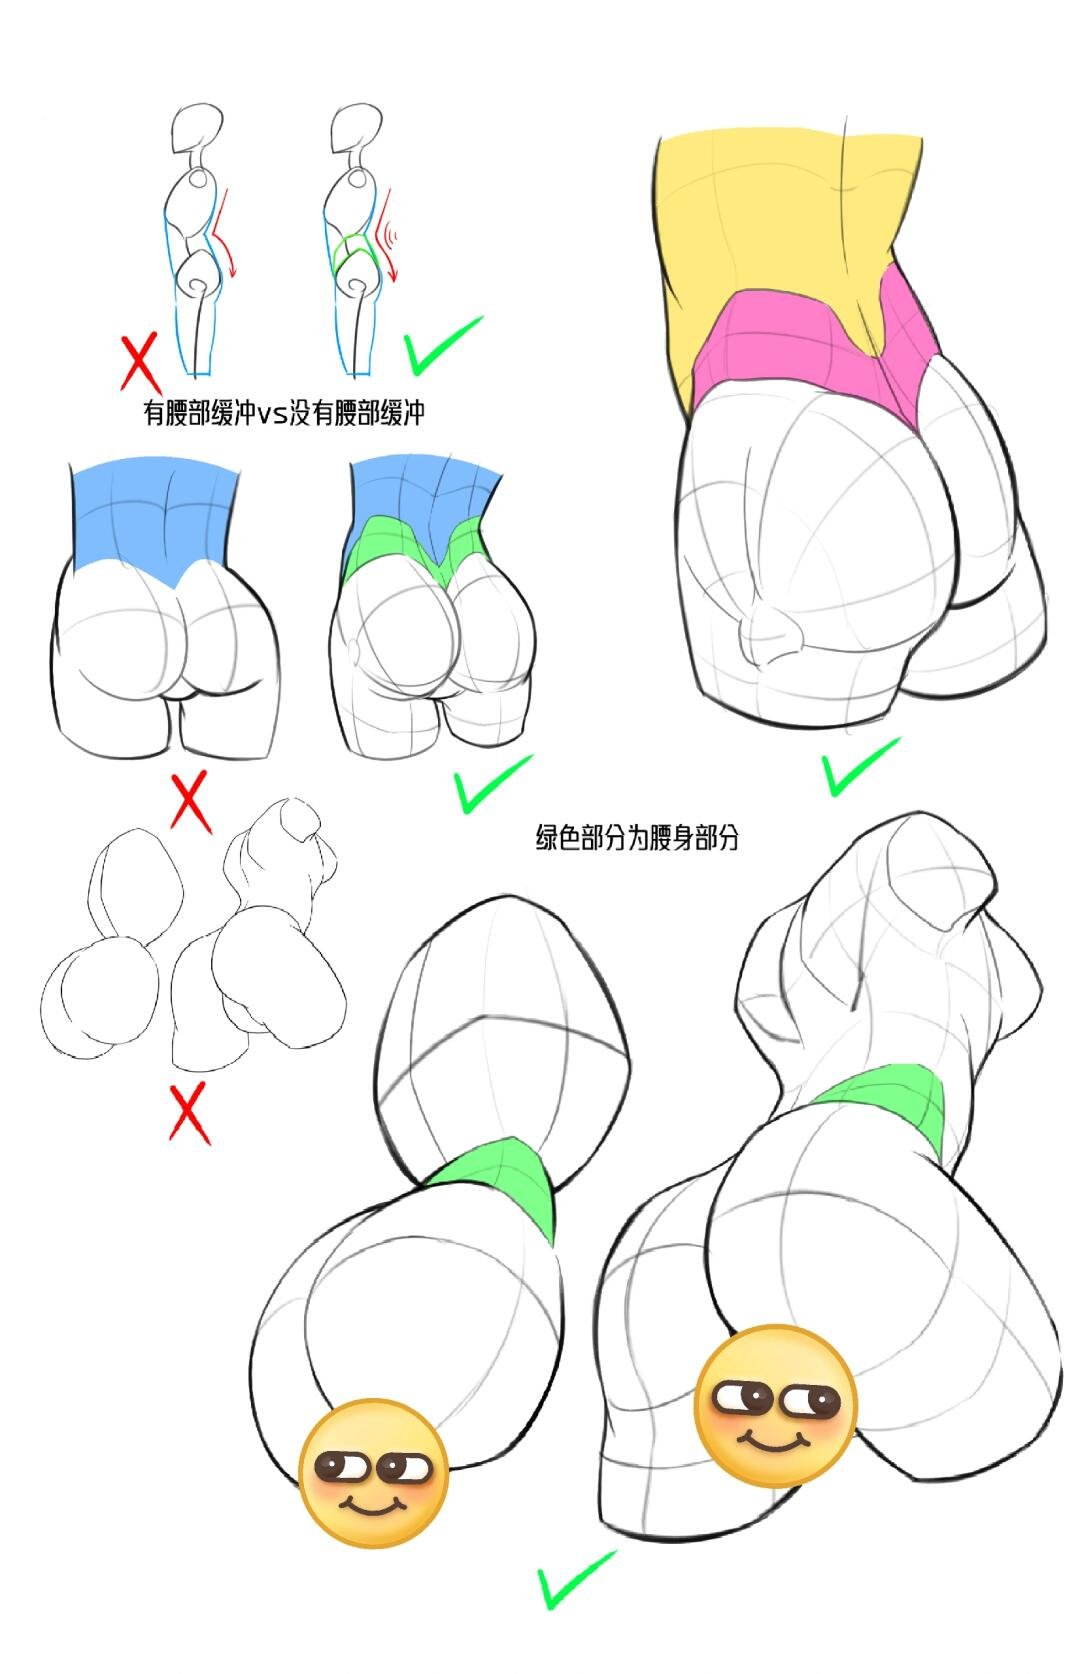
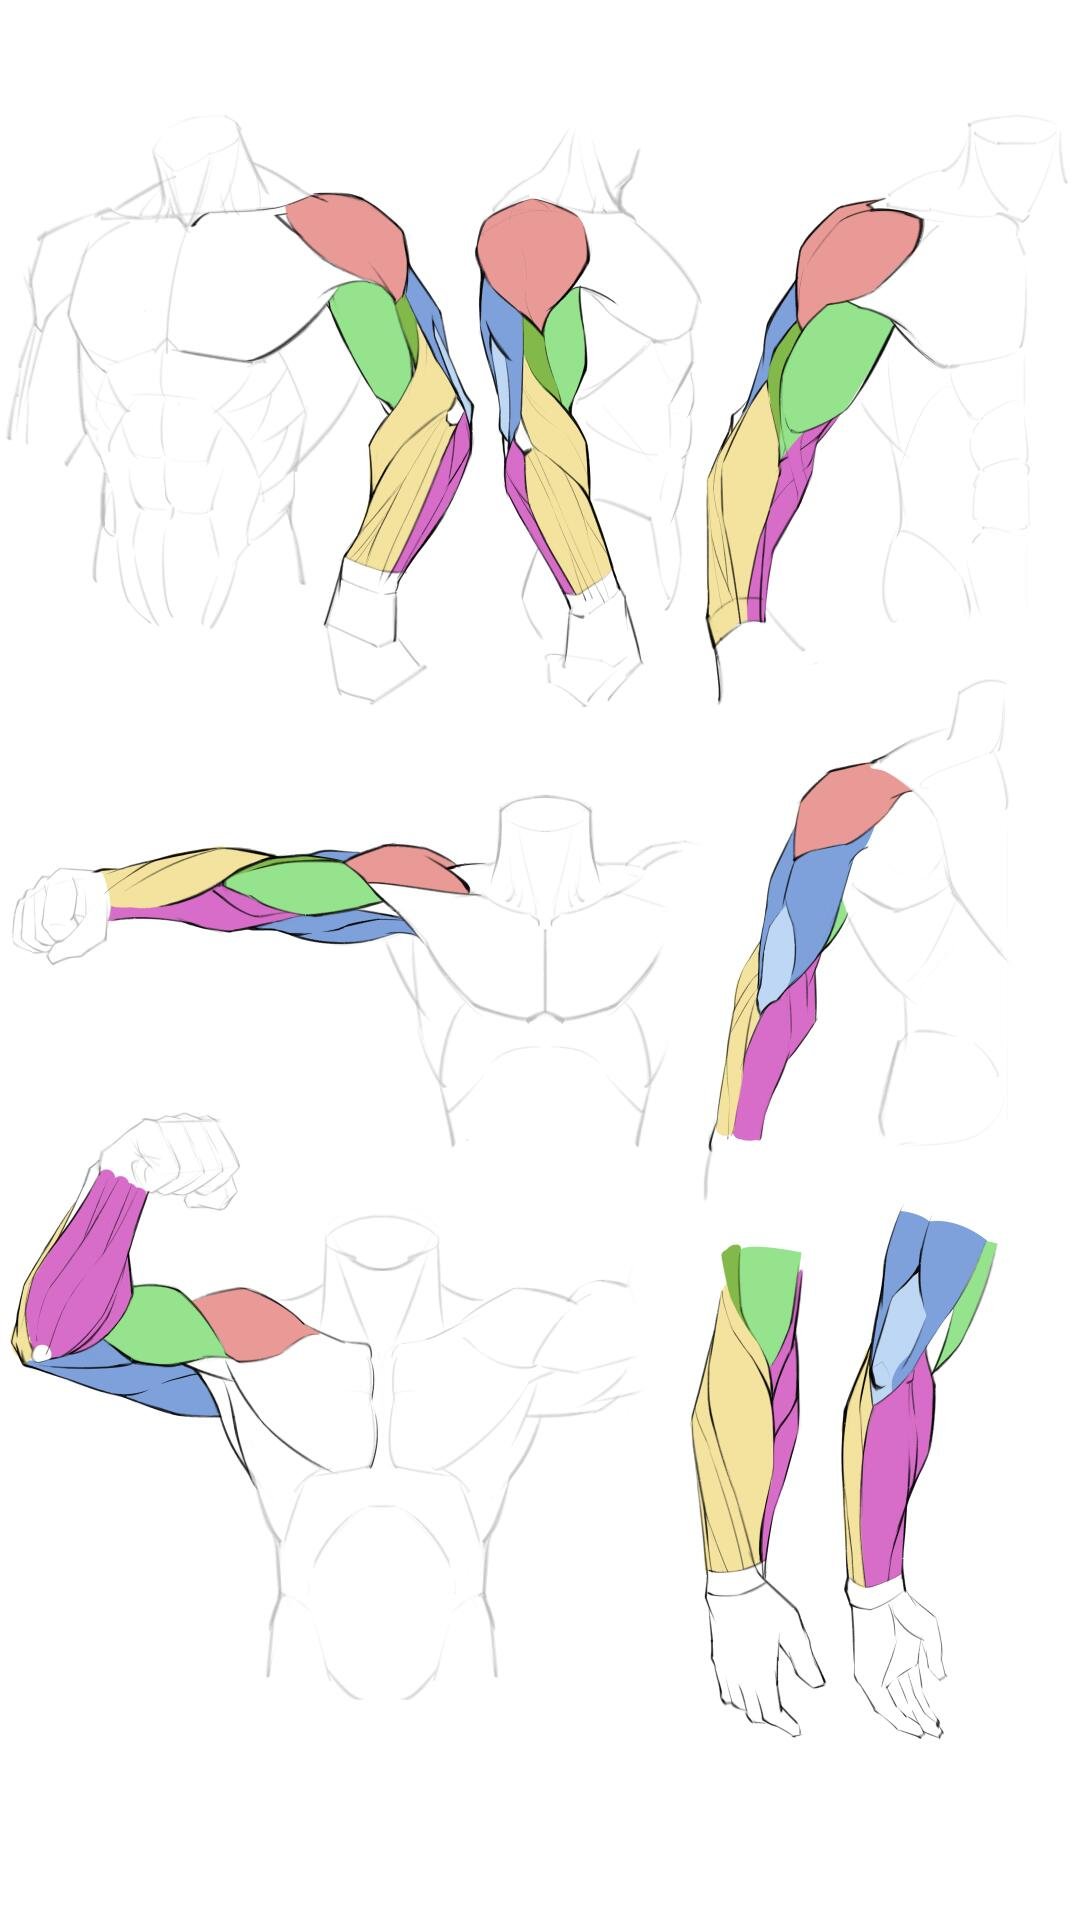
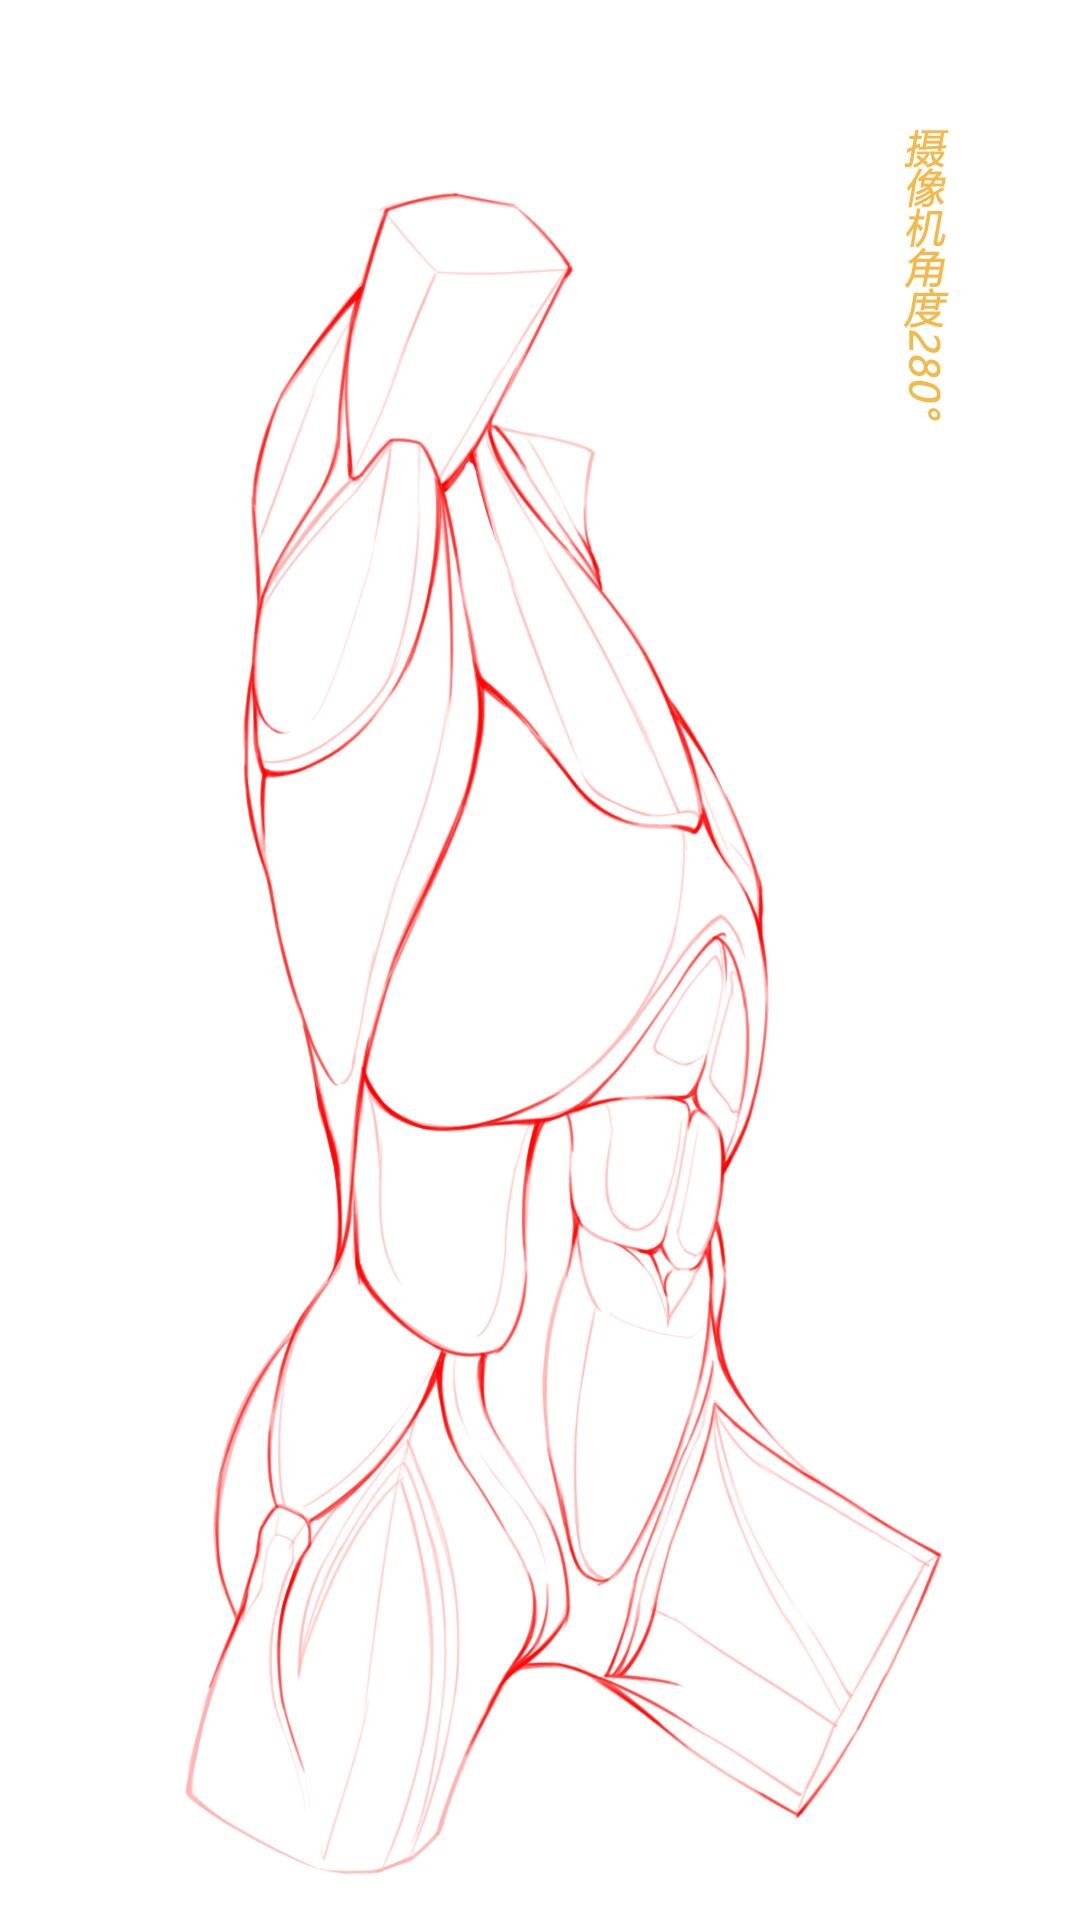
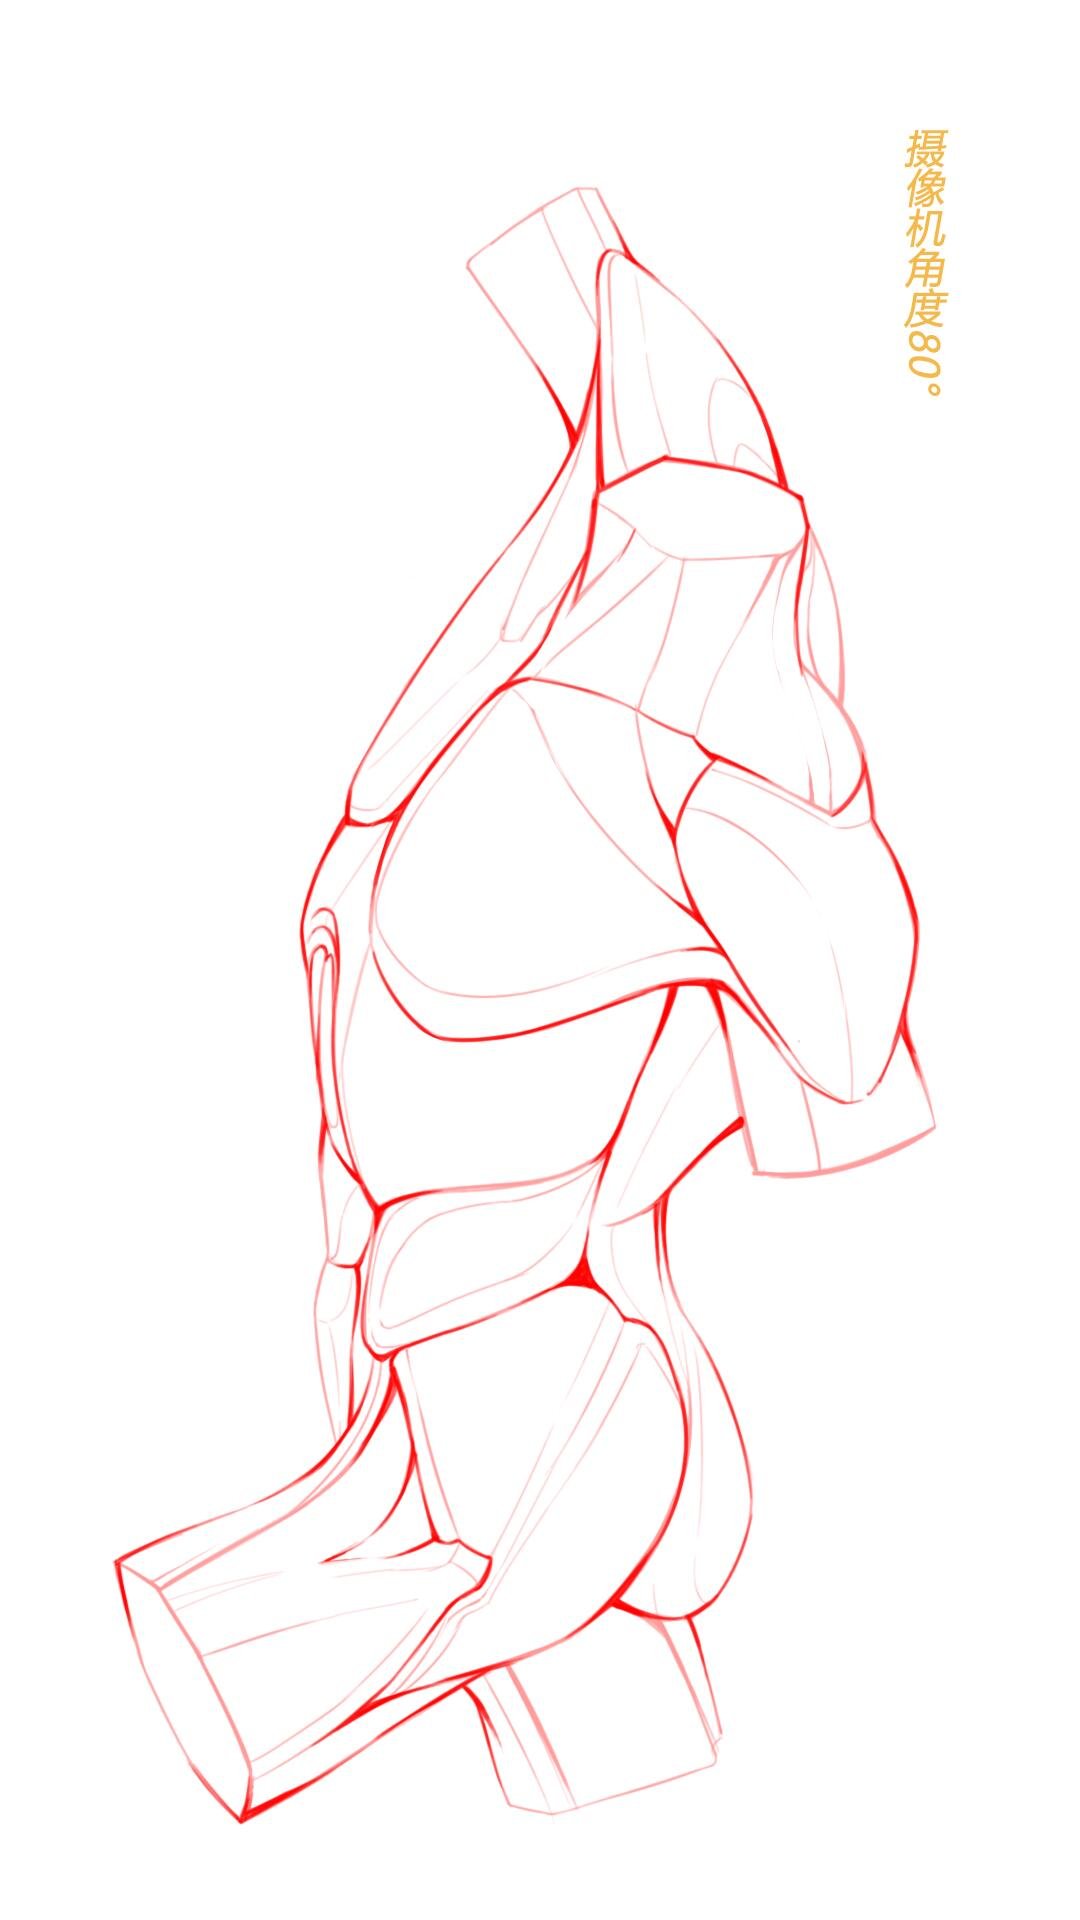
Muscle Groups: Learn the major muscle groups and their functions. Focus on the larger muscles that define the body’s shape, such as the pectorals, deltoids, biceps, and quadriceps. Knowing how muscles attach to bones and how they flex and relax will add depth to your drawings.
-
Body Fat Distribution: Different body types have varying fat distributions. Understanding where fat tends to accumulate on the body will help you create more diverse and realistic figures.
By studying anatomy, you’ll develop a mental library of how the body is constructed, allowing you to draw more confidently from imagination or reference.
Credit: 波叔教画画
Mastering Basic Shapes: The Building Blocks of Body Sketching
Before diving into detailed drawings, it’s essential to break down the human body into basic shapes. This approach simplifies the complex form and helps you establish the overall structure quickly. Here’s how to get started:
Cylinders and Spheres: Use cylinders for limbs and the torso, and spheres for joints and the head. These simple shapes will help you capture the body’s volume and proportions.
Ovals and Rectangles: Employ ovals for the ribcage and pelvis, and rectangles for the hands and feet. These shapes will serve as placeholders for more detailed features.
Triangles: Utilize triangles to represent the shoulders and hips, helping you establish the body’s overall silhouette.
Practice combining these shapes to create quick, loose sketches of various poses. As you become more comfortable, you’ll be able to refine these basic forms into more detailed and accurate representations of the human body.
Proportions and Measurements: Getting the Body Structure Right
Accurate proportions are crucial for creating believable human figures. While individual body types vary, there are some general guidelines you can follow:
Head-to-Body Ratio: In most adult figures, the body is typically 7-8 heads tall. This measurement can be adjusted for stylized drawings or to depict different age groups.
Midpoint Rule: The pubic bone usually marks the midpoint of the body. Use this as a reference when positioning the legs and torso.
Arm Length: When standing straight, the fingertips should reach about mid-thigh. The elbow typically aligns with the bottom of the ribcage.
Shoulder Width: Adult shoulders are generally about 2-3 head widths across.
Hip Width: Hips are usually slightly narrower than shoulders in males and about equal to shoulder width in females.
Remember, these are general guidelines and can be adjusted based on individual body types or stylistic choices. Practice measuring and comparing different body parts to develop your eye for proportions.
Credit: 波叔教画画
Capturing Movement and Gesture in Body Drawings
Static figures can look stiff and lifeless. To create dynamic and engaging body drawings, focus on capturing movement and gesture:
Line of Action: Start your sketches with a single, flowing line that represents the figure’s overall movement. This “line of action” will guide the pose and add energy to your drawing.
Quick Gesture Drawings: Practice creating rapid, 30-second to 2-minute sketches that focus on the overall pose rather than details. This exercise will help you capture the essence of movement quickly.
Contrapposto: Learn to incorporate contrapposto, a pose where the figure’s weight is shifted onto one leg, creating a natural S-curve in the body. This technique adds a sense of balance and dynamism to your drawings.
Exaggeration: Don’t be afraid to slightly exaggerate poses to enhance the sense of movement. This is especially useful in stylized or action-oriented drawings.
By focusing on movement and gesture, you’ll breathe life into your figure drawings and create more engaging compositions.
Credit: 波叔教画画
Anime Body Drawing: Stylization Techniques and Tips
Anime-style body drawing incorporates unique stylization techniques while still maintaining a sense of human anatomy. Here’s how to approach anime body drawing:
-
-
Exaggerated Proportions: Anime characters often have larger eyes, smaller noses, and more slender bodies compared to realistic figures. Experiment with these proportions to find a style you like.
-
-
-
Simplified Shapes: Use more geometric shapes for body parts. For example, the torso might be a simple rectangle or trapezoid, while limbs are often drawn with straight lines rather than curves.
-
-
-
Hair and Eyes: These features are typically emphasized in anime style. Practice drawing large, expressive eyes and dynamic hair styles that defy gravity.
-
-
-
Minimal Detailing: Anime bodies often have less muscular definition than realistic drawings. Focus on clean lines and smooth contours rather than intricate musculature.
-
-
-
Dynamic Poses: Anime characters are known for their dramatic and sometimes impossible poses. Don’t be afraid to push the limits of realistic body movement.
-
Remember, there are many sub-styles within anime art. Study your favorite anime artists and series to develop a style that resonates with you.
Credit: 波叔教画画
Common Mistakes to Avoid When Drawing Bodies
As you practice drawing bodies, be aware of these common pitfalls:
- Stiff Poses: Avoid perfectly straight lines in your figures. Even when standing still, the human body has subtle curves and asymmetry.
- Inconsistent Proportions: Make sure all body parts are in proportion with each other. A common mistake is drawing hands or feet too small.
- Ignoring the Skeleton: Remember that bones dictate the body’s structure. Don’t draw muscles or fat in areas where they anatomically can’t exist.
- Symmetrical Faces: Human faces are never perfectly symmetrical. Introduce subtle asymmetry for more realistic portraits.
- Uniform Body Types: Challenge yourself to draw diverse body types, ages, and ethnicities to broaden your skills.
- Neglecting Foreshortening: When drawing limbs or bodies extending toward or away from the viewer, practice foreshortening to create a sense of depth.
- Over-defining Muscles: Unless you’re drawing a bodybuilder, avoid making every muscle group highly defined. Remember that skin and fat soften the appearance of muscles.
- By being aware of these common mistakes, you can actively work to avoid them and improve your body drawing skills more quickly.
Resources and References for Aspiring Artists
To continue improving your body drawing skills, consider exploring these resources:
- Anatomy Books: Invest in comprehensive anatomy books for artists, such as “Atlas of Human Anatomy for the Artist” by Stephen Rogers Peck or “Figure Drawing for All It’s Worth” by Andrew Loomis.
- Online Tutorials: Websites like Proko, DrawingNow, and Skillshare offer excellent video tutorials on figure drawing.
- Life Drawing Classes: Attend life drawing sessions to practice drawing from live models. This invaluable experience will significantly improve your observational skills.
- Digital Resources: Websites like Line-of-Action and QuickPoses offer timed figure drawing exercises with a variety of reference images.
- Anatomy Software: Programs like Anatomy360 or BodyReference provide 3D models that you can manipulate for reference.
Conclusion: Developing Your Unique Style in Body Drawing
As you continue to practice and refine your body drawing skills, you’ll naturally begin to develop your own unique style. This personal touch is what will set your artwork apart and make it truly yours. Start your journey today by setting up a dedicated sketchbook for figure drawing practice. Challenge yourself to draw at least one figure every day for the next month. Remember, every master was once a beginner – your artistic journey starts now!